Tag Archive for: tubular

Be prepared for the inevitable, learn how to change your tubular

Changing a tubular. Get ready for fun. Seriously! Many factors can lead to the need to change your tubular. Regardless of what happens, the fact remains, you still need to learn how. Make sure you have the materials below before beginning this process. Follow the directions and you’ll be cycling again in no time.

Materials needed:

  1. tubular tire (and wheel)
  2. clear glue, Hutchinson Tubular
  3. pump
  4. patience
  5. valve extender
  6. Teflon tape (used in plumbing)

Directions:

Before you begin to change your tubular, be sure to stretch out the new tire before trying to mount it on the wheel. You can do this by stepping on the inside of the tire and pulling the rest of the tire up towards you. You’ll hear it stretch. Using the Teflon tape, wrap the top of the Presta valve (after unscrewing the top of the valve) with Teflon tape. Now screw the valve extender onto the valve stem, making sure to leave the valve open. Take the glue and leave a bead of glue around the rim about 1/4 inch thick. Insert the valve through the valve stem hole. As you pull the tire down over the wheel be sure to stretch it and the tire should slip on the wheel. Inflate the tire to about 50 or 60 lbs. so the tire takes it shape. Let the wheel dry for 24 to 48 hours before riding. BE SURE TO INFLATE TIRE TO MAXIMUM PSI, for most conditions 140 is sufficient. Failure to inflate tires before riding could result in a race day crash. No one wants that.

We highlight the pros and cons of tubulars and clinchers

If you’re relatively new to triathlon then you’ve probably noticed many new terms, like tubulars and clinchers. Even veteran triathletes are learning new terminology about the sport. Whether you’re new to triathlon or you’ve been racing for years, we break down the difference between tubulars and clinchers.

Learn about the pros and cons before you decide to make any purchases, replacements, or upgrades. Share on X

Tubulars

Tubular tires, also known as “sew-ups” or “sprints” differ from clinchers in that they don’t have beads. Instead, the two edges of the tire are sewn together around the inner tube. Tubulars are used on special rims and are held on to the rims by glue.

Pro
– the lightest practical tubulars will always be lighter than the lightest clincher
– if you flat, you can ride on it for a little longer
– if glued properly, the tire will stay on the rim even if it flats
– ride quality
Con
– costs more (rims and tires)
– more difficult to maintain
– hard to repatch as an individual without team support on the road
– you could get tire/rim separation, especially when rims are hot from braking and end up like Joseba Beloki in the 2003 Tour de France.

Clinchers

Conventional tires used on 99% of all bicycles are “clincher” type, also known as “wire-on.” They consist of an outer tire with a u-shaped cross-section and a

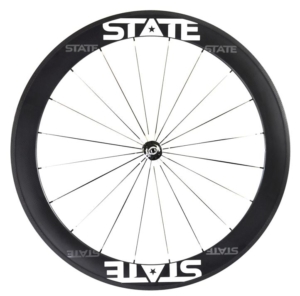
state wheels clincher wheel

State Wheels Carbon Clinchers come in a variety of depths and are handmade in Austin, Texas

separate inner tube. The edges of the tire hook over the edges of the rim and air pressure holds everything in place.

Pro
– wheelsets are less expensive even if you get a really nice set
– replacement tubes are way less expensive
– you can replace the tube without replacing the tire
– wheels are more common
– easier to patch on the road, no need for gluing, stretching tire, etc.
Con
– if you flat, you can’t really ride on it
– some say a lower-quality ride
– will always be heavier than tubulars (tube, tire, clincher interface)
The ride quality and weight differences between tubulars and clinchers are getting smaller, but will always continue to be there. Especially with carbon wheels – carbon clinchers are more difficult to make and will be heavier than their carbon tubular rim counterparts.