Learn the difference between trainers and rollers

Bicycle trainers and rollers can come in handy when your training moves indoors. Many factors can force this switch, from weather to time restrictions. Price, skill level, usage, and ability can all factor into your purchasing process. Use the info below to your advantage when shopping for trainers and rollers.

Bicycle Trainers

A bicycle trainer is typically a tri-pod devise that secures the bike into a stationary riding position. The rear wheel is held off the ground by locking the skewer into the trainer. The front wheel is held off the ground by a riser block to make the bicycle level. Some riser blocks have multiple positions to simulate climbing or descending. There are three types of resistance to your wheel:
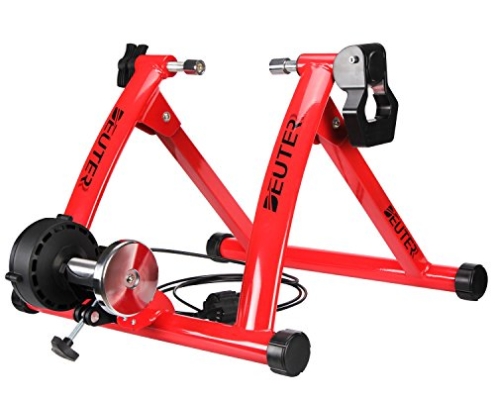
When talking trainers and rollers, magnetic trainers are the best bang for your buck.

Magnetic trainers are the best bang for your buck.

Wind – This affordable unit runs between $85 and $120, but expect a lot of noise. It is best used for short rehab stints, monthly rainy day riding sessions, or someone on a really tight budget. The noise from this type of trainer is caused by human force against the tire and from the small channels in the unit that catch air and add resistance. Due to the noise level, it is hard to watch television or listen to the radio while in use. Changing resistance levels is cumbersome because one must get off the bike to tighten or loosen the resistance to simulate different terrains. Although affordable, the parts of this unit are not created for heavy everyday use. Unnecessary wear to the rear tire will also occur when used daily.

Magnetic – Based on price ($125-$250), durability, and noise projection, this is the most practical unit of the three. It is not exactly like riding on the road, but similar enough. The mag trainer is set up like the wind trainer, but uses magnetic resistance instead of wind. This trainer allows for TV viewing and music listening.  The unit also stands up to multiple rides per week. It will simulate multiple terrains just by changing the gears of the bike. Some units come with a wired remote shifter to change resistance without getting off the bike.

With the magnetic trainer, cyclists get the most bang for their buck. Share on X
Fluid – The most expensive of the three types of trainers is the fluid trainer. This unit best mimics the feel of being on the road. Prices range from $250 to $399 but will definitely stand the test of time. It is the most durable trainer because it is designed for serious indoor cyclists who will spend hours a day on it. The resistance of this unit is controlled solely with the shifters on the bike.

Bicycle Rollers

Wikipedia describes rollers as “a type of bicycle trainer which makes it possible to ride a bicycle indoors without moving forward. However, unlike other types of bicycle trainers, rollers do not support the bicycle. They normally consist of three cylinders, drums, or “rollers” (two for the rear wheel and one for the front), on top of which the bicycle rides. A belt connects one of the rear rollers to the front roller, causing the front wheel of the bicycle to spin when the bicycle is pedaled. The spacing of bicycle rollers can usually be adjusted to match the bicycle’s wheelbase. Generally, the front roller is adjusted to be slightly ahead of the hub of the front wheel.”
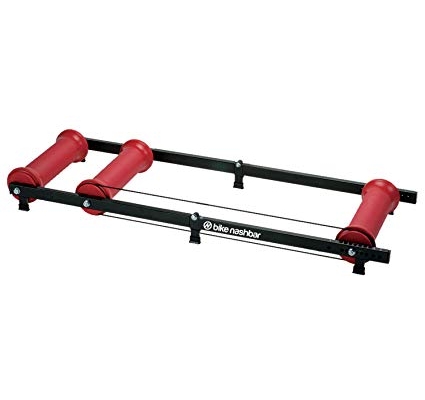
When deciding between trainers and rollers, know that rollers require more skill.

Rollers require great balance and handling awareness.

Like trainers, rollers also come in different levels, but they all use the same type of resistance – human resistance.  The main reason to use rollers is to work on bike handling skills. Rollers increase handling skills by increasing balance on the bike. This is crucial for draft-legal racing and riding in tight quarters. Rollers take a constant state of awareness while in use. The price of rollers (between $175 and $399) is determined by the type of material from which the drums are made – aluminum or plastic.  Aluminum rollers cost a little more but will last longer. Plastic rollers will generally not last as long and will also wear the tire out quicker.
Both trainers and rollers have their purpose in the sport of triathlon. Trainers are more practical for everyday use because they meet the needs of the fitness cyclist: set the bike up, pop in a movie and ride. They are safer (than rollers) and easier to use for a large number of people positioned in one place. They are a good replacement for getting a nice ride on the road. Rollers, on the other hand, are more of a tool than a ride replacement device. They are used for serious cyclists to help increase cadence efficiency and balance on the bike. Rollers are not recommended for beginner cyclists because of the safety factor. Both trainers and rollers are foldable and easy to store.
Common brands:  Cycle-Ops, Wahoo Kickr, and Kinetic

Many people don’t realize that a few millimeter adjustments can make a huge difference on how they feel on their bike. If you have the feeling like you are not making gains or if you have pains after riding, you may want to try adjusting your saddle height.

What is Saddle Height?

The saddle height is the distance between the heart of the pedal axle and the top of the saddle.

Saddle height is set by adjusting the seat post to an ideal height that balances comfort and power on the bike.

Why Change?Kerrville Triathlon adjust saddle height

Saddle height is arguably the single most important adjustment on your bicycle. Incorrect saddle height can contribute to saddle discomfort, anterior and posterior knee pain, poor leverage, and ultimately limiting power production. When you are doing your best to fuel your body, you may be losing power other ways like incorrect saddle height.

Ways to Set Your Saddle Height

There are many methods and formulas to derive at “proper” saddle height. One of the best approaches is to establish it based on the rider’s individual ride characteristics and flexibility.

Today’s technological influences impact shoe, cleat, and pedal contact points so dramatically that it is important to have your saddle height evaluated by a knowledgeable and qualified bike fit specialist. Share on X

If you are looking for recommendations, you can visit with Josh at Jack & Adam’s Fredericksburg or with the crew over at Mellow Johnny’s.

A bike fit specialist can detail in what way your individual characteristics and equipment may be contributing to any performance or biomechanical limitations.

If you can’t make it to a bike fit there is still a solution. Before your next ride if you want to experiment at home you can follow the “heel to pedal method”. This will get you in the ballpark range before you can see a professional.

Bit fitting saddle height

First, mark the current height.

Then, put your bike on the trainer. Pedal around to make sure you are in the position you normally ride in. Place your heel on the pedal and pedal backward to reach the six o’clock position. Your knee should be completely straight.

If you are having trouble making contact with your pedal with your heel – the seat is too high. If your knee is bent – it is too low.

Make very small adjustments, in millimeters until your leg is straight with the heel on the pedal.

Adapting to Your New Saddle Height

Once a proper height is found, wrap a strip of electrical tape around the base of the post where it meets the seat clamp.

Take measurements and record in a safe location for future reference.

Make the first few rides out on your new saddle height short and sweet. It can take a few rides before your body is adapted.

If you experience any new pains be sure to follow up with the person who did your bike fit. Do not ride through the pain. Share on X

It is good to get your bike fit looked at at least every few years or if you get new equipment such as new shoes or pedals. Check here to see how often you should replace some of your gear.

Ride Happy!

Kerrville Tri – New July Playlist

The days are getting longer and it is about time for a playlist refresh. We put together 1.5 hours of jammin’ tunes to keep you motivated while you move. Play from start to finish or pick and choose to add to your own playlist.


Meet our Mascot!

Buck is your friendly Kerrville Triathlon Mascot, always there for photo ops and high fives. Look for him at Swim Start before the race and at the awards ceremony at the finish line. Kids can race him from the start at the Kids Fun Run on Saturday. He’ll also be making surprise appearances around the event, so keep an eye out for his antics. Don’t miss the chance to interact with Buck and make your race day even more memorable!


We highlight the pros and cons of tubulars and clinchers

If you’re relatively new to triathlon then you’ve probably noticed many new terms, like tubulars and clinchers. Even veteran triathletes are learning new terminology about the sport. Whether you’re new to triathlon or you’ve been racing for years, we break down the difference between tubulars and clinchers.

Learn about the pros and cons before you decide to make any purchases, replacements, or upgrades. Share on X

Tubulars

Tubular tires, also known as “sew-ups” or “sprints” differ from clinchers in that they don’t have beads. Instead, the two edges of the tire are sewn together around the inner tube. Tubulars are used on special rims and are held on to the rims by glue.

Pro
– the lightest practical tubulars will always be lighter than the lightest clincher
– if you flat, you can ride on it for a little longer
– if glued properly, the tire will stay on the rim even if it flats
– ride quality
Con
– costs more (rims and tires)
– more difficult to maintain
– hard to repatch as an individual without team support on the road
– you could get tire/rim separation, especially when rims are hot from braking and end up like Joseba Beloki in the 2003 Tour de France.

Clinchers

Conventional tires used on 99% of all bicycles are “clincher” type, also known as “wire-on.” They consist of an outer tire with a u-shaped cross-section and a

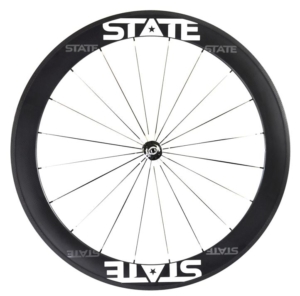
state wheels clincher wheel

State Wheels Carbon Clinchers come in a variety of depths and are handmade in Austin, Texas

separate inner tube. The edges of the tire hook over the edges of the rim and air pressure holds everything in place.

Pro
– wheelsets are less expensive even if you get a really nice set
– replacement tubes are way less expensive
– you can replace the tube without replacing the tire
– wheels are more common
– easier to patch on the road, no need for gluing, stretching tire, etc.
Con
– if you flat, you can’t really ride on it
– some say a lower-quality ride
– will always be heavier than tubulars (tube, tire, clincher interface)
The ride quality and weight differences between tubulars and clinchers are getting smaller, but will always continue to be there. Especially with carbon wheels – carbon clinchers are more difficult to make and will be heavier than their carbon tubular rim counterparts.

Time for some tri gear upgrades!

After you cover getting the basics for a triathlon, there comes a large list of wants and upgrades. This edition of Tri Gear Round Up we will focus on some of these upgrades and the benefits of each. After you cover getting the basics for a triathlon, there comes a large list of wants and upgrades. This edition of Tri Gear Round Up we will focus on some of these upgrades and the benefits of each.


Ibera Bicycle Lightweight Aluminum Water Bottle Cage

These cages are a significant upgrade from your standard aluminum cages. They are lightweight and give you that “carbon cage” look without breaking the bank. Also, the design allows you to remove your bottles with ease while keeping the bottle secure while riding. Now if you already have something like this and are looking for the next upgrade, it is time to go carbon.
<p>For your rear hydration set up, it is best to go with the XLAB Gorilla cage. This carbon cage is pricey, but it makes up for it by keeping your bottles secure on long rides. No more launching bottles, yay!
<p>If you have a smaller bike frame, you may consider a side entry bottle cage. These allow you to remove the bottle to the side instead of pulling up.


Fi’zi:k Performance Bar Tape

Most bikes start out with a simple cork bar tape. While these are just fine when starting out, if you find yourself on the bike more you may want to upgrade. Fi’zi:k may seem like a weird name, but they make great products including bar tape. Fizik’s Performance Bar Tape comes in two distinct styles: Soft and Tacky. We like the tacky finish as it keeps your hands or gloves glued to the bars even if it gets wet. The 3mm thickness of the tape gives a dense-yet-forgiving comfort to your bars.
<p>If Fizik doesn’t have the color you are looking for, a great second option is Lizard Skin Bar tape.


Continental Grand Prix 4000s II Cycling Tire

The Grand Prix 4000s II is a great all around tire. It is a combination of reliability, comfort, low rolling resistance, and performance in weather situations. It also does well with punctures.
<p>The patented BlackChili Compound improves rolling resistance by 26 % and provides 30 % more grip than activated silica compounds. The only option that you will have to make is the width since it comes in both a 23c and 25c.


Chamois Butt’r Anti-Chafe Cream, individual packs

If you are not using a Chamois cream then start now, you will thank us. The real upgrade here is in the individual packs. These are easily stored in your bento box or your jersey pocket.
<p>Chamois Butt’r immediately improves riding comfort & soothes already chafed or irritated skin. It lubricates, soothes and softens the skin of all athletes who experience chafing. Apply liberally to skin and/or chamois before each ride. May be applied to any skin areas that rub together or against clothing, i.e., rubbing thighs or underarms.


YETI Rambler 14 oz Stainless Steel Vacuum Insulated Mug with Lid

Ok, so technically this piece of “tri gear” is not triathlon specific but it is an upgrade. As triathletes, we put in the long hours, and we deserve hot coffee when we want it!
<p>This Yeti Rambler is a great size and comes with a comfortable handle. The double-wall vacuum insulation keeps cold drinks cold and hot drinks hot until the last sip. So fill this up with your favorite and leave it in your car to enjoy when you get back from your workout.


Kool Kovers Bicycle Shoe Cleat Cover Set

Protect your investment with cleat covers. Covers protect cleats from wear and make walking easier. No more slipping as you shuffle into the bike shop on a mid-ride pitstop. They are also a good option for preventing mud and dirt from building up inside cleats. Just put these on your shoes in transition and then take them off once you reach the mount line.
<p>They are super easy to attach, remove, and store (in your saddle bag or jersey pocket).


Represent a Reason and take your training to the next level!

People race Kerrville Triathlon for many reasons. It’s the most scenic triathlon in Texas. Most race to prove to themselves they can complete a longer distance triathlon. Others race to beat their previous time. Some participate to stay in shape. Whatever your reason you choose to race Kerrville Tri, you can make your training and race day that much more meaningful when you Represent a Reason! Share on X

When you Represent a Reason you have the opportunity to raise funds and awareness for the nonprofit organization of your choice. Fundraising becomes your defacto fourth discipline when you’re training for Kerrville Tri and racing on Saturday, Sept. 29th, or Sunday, Sept. 30th. Use your triathlon training to take your impact beyond race day! You can get your friends, family, and training groups/clubs involved too. Anyone can Represent a Reason and make a difference for their preferred charity. Start fundraising today using the steps below!

Step 1: Register for the race and create a fundraiser

  • Click “Set Up Your Fundraiser” and choose your charity – a page will be created and you’ll be ready to start fundraising.

Step 2: Share with the world

  • Your fundraising page allows friends and family to donate directly to your cause and helps you share your story.

Step 3: See your impact

  • Your personal page collects your fundraising totals together in one place – your overall impact.

Let us know on Facebook, Twitter, and/or Instagram what charity you’ll support when you Represent a Reason!

Is your body like a racecar?

Maybe you should think of your body as a racecar! For long-distance racing (swimming, biking, running), nutrition is the key to success. That is assuming you appropriately trained for the race and pace yourself based on your training. The biggest thing we see is the lack of knowledge around calories and the fear of not having enough salt. Cramping, bonking, blowing up, are all things we want to avoid. What causes them?

Cramping

Cramping is caused by overuse and lack of sodium. Cramping in a short-distance event is due to overuse and not the body’s lack of sodium. Cramping in a long-distance event can be due to sodium, but it can also be due to overuse. If it is due to lack of sodium, it will not be in one isolated area, like your calf. You will feel the cramping across the entire body. Once this happens, it is nearly impossible to recover during any mid-distance event.

Bonking

Caused by running out of fuel during a long-distance event. It is almost impossible to truly bonk during a short event (less than one hour).

Blowing up

Blowing up is the most common issue that most people confuse with the other two. Blowing up is caused by going too fast. Using your muscles at a level for which you did not train them will cause them to cramp up. If you can average 20 mph at your local TT of 15 miles, this does not mean you can hold this average for the bike of a half or full Ironman.

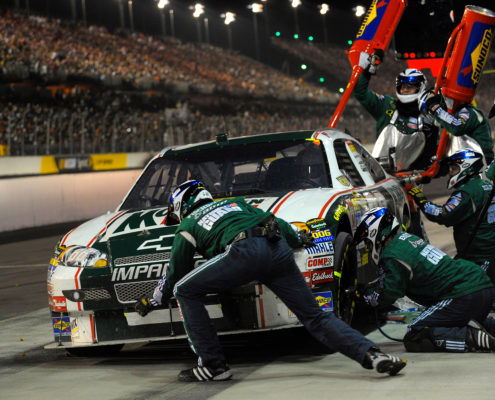
To keep it easy, you want to think of your body like a racecar. Your car needs three basic things to keep running: Gas, oil, and electricity. Share on X

3 basic things the body needs to perform at a long distance event

The three things your body needs to perform during a long-distance event are water, calories, and sodium. Everyone’s body processes calories, water, and sodium at different rates. It is not possible to replace everything you burn in terms of calories, but the replacement of water and sodium while you slowly dig a calorie hole is the key to success.

Your body needs calories like a racecar needs gas.

Gas is like your calories. Calories are the fuel your body needs to run.

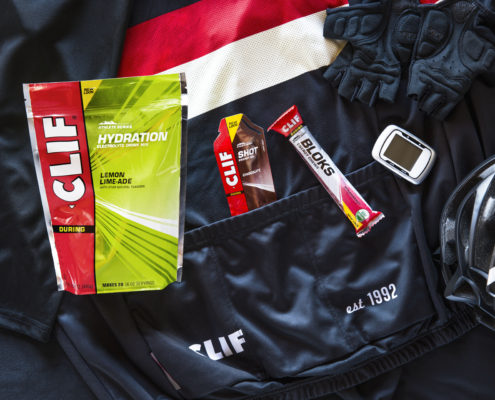
Gas is like your calories. This is the fuel your body needs to run.  Calories can come in the form of Clif Shot Energy Gels, Clif Bars, Clif Bloks, chews, breakfast, or any other food or liquid that has calories. Watch your sports drinks as they may have calories as well.

Oil is like your water. Water lubricates your joints and allows your engine to process and burn fuel.

Electricity is like your sodium. Sodium is what your body needs to allow its muscles to fire.

You can be low in these different areas, but being empty in these areas is what causes major trouble. The purpose of this analogy is to help people better understand what is going on with your body. Checking on properly identify nutrition issues and better keep your body running like a racecar.

Wash your bike and extend the life of its parts

This time of year it seems like you always need to wash your bike. Whether it is from rain or indoor trainer rides, it seems like your bike is always dirty, even a couple of days after you wash your bike.

Everybody knows that when you ride in the rain your bike will get dirty, but it can get just as dirty from sweat and sports drinks when riding on a trainer. Share on X

Items needed to thoroughly degrease and wash your bike

1. Workstand or something to hold the bike off the ground (a rear car rack works well)
2. Brushes (I personally prefer the Finish Line Pro Brush Kit, but there are several different brush sets to choose from)
3. Bucket (Home Depot or Lowes both have cheap 5-gallon buckets)
4. Simple Green (standard green stuff is what we use at the shop)
5. Degreaser (every lube company makes one) Tip: don’t use anything real strong, it can damage the paint finish on your bike
6. Access to a garden hose (don’t use a pressure washer, the high pressure can push the grease out of the bearings)

Follow these steps

The first thing to do is put a little degreaser on the chain. Don’t use too much, a little goes a long way. Let it sit on the chain for a minute or two. Give the chain a light scrubbing and rinse it off with the hose. Next, make a Simple Green solution with about a 3 to 1 ratio of water to Simple Green. Take your big brush and use the solution to wash all the big parts of the bike (frame, fork, wheels, cranks, and derailleurs) Smaller brushes work better in the tight areas. I like to start at the front of the bike and go back so I don’t miss anything.

Use the garden hose to rinse off the entire bike. Don’t forget to wash the bar tape, saddle, and tires. These parts tend to get forgotten and they can get pretty gross if they stay dirty. Washing your tires also gives you a chance to inspect them for big cuts and pieces of glass that may be embedded in the rubber. You can let it dry outside or hand-dry it with a towel. After it has dried off you can then lube the chain and it will be ready to ride next time.

If you keep your bike clean it will prolong the life of every part on the bike and help to keep it working perfectly. Remember: a clean bike is a happy bike.

by: James Balentine, owner of City Limit Cycles, an Austin, Texas-based mobile bicycle repair company that comes to you. Balentine began working with bikes in 1990 when he was 12. He began racing mountain bikes in 1991 and BMX in 1992, winning 12 national championships before turning pro in 1999. He has worked with USA Triathlon as a mechanic for Team USA since 2004. Since 2013, Balentine has worked with the US Paratriathlon team and is their sole mechanic.