Triathletes from 15 different states prepare for Kerrville Triathlon, the most scenic triathlon in Texas

High Five Events concludes their 2018 triathlon season with the Kerrville Triathlon Festival. The event will take place on Saturday, Sept. 29 and Sunday, Sept. 30, in Kerrville, Texas. More than 1300 athletes will participate in this beloved Hill Country event. Entering its eighth year, Kerrville Tri is rapidly becoming known for featuring the most scenic triathlon course in Texas.

Triathletes will participate on a course highlighted by swimming in Nimitz Lake, cycling through the Texas Hill Country, and running along the Guadalupe River. After crossing the finish line, participants can grab an inner tube provided by the event and float in the cool waters of the Guadalupe River. Before the action begins, participants and their friends and family are invited to the ROKA Happy Hour. This gathering will take place on Friday, Sept. 28th, from 7:30 p.m. – 8:30 at the Inn of the Hills bar.

“People are buzzing about the 8th Annual Kerrville Triathlon Festival because it combines triathlon distances for everyone, the City of Kerrville’s hospitality, and the beauty of the Texas Hill Country,” said Stacy Keese, co-owner of High Five Events. “We’re just as excited as the City of Kerrville to host triathletes from 15 different states and see the continued growth of this event.”

Swim, bike, run in the Texas Hill Country

The Kerrville Triathlon Festival will feature the Debra Zapata Sprint distance, sprint relay, and free Kids Fun Run on Saturday. Quarter distance, quarter aquabike, half distance, half aquabike, and half relay will all take place on Sunday. The sprint will begin at 7:30 a.m. on Saturday. The half will begin at 7:30 a.m. on Sunday. Triathletes who would like to participate but are unable to travel to Kerrville can register for the virtual Kerrville Triathlon.

Participants can pick up their packet at the Kerrville Triathlon Expo and Packet Pickup. That will take place at the host hotel, Inn of the Hills. The expo and packet pickup, which is free and open to the public, will take place on Friday, Sept. 28th, and Saturday, Sept. 29th. Registration for all distances is still open for the Kerrville Triathlon Festival. Volunteer positions are available as well.

Athletes will receive custom-designed shirts and trucker hats, water bottles, ROKA swim caps, beer, belt buckle finisher’s medal, a post-race meal including fajitas and tacos from H-E-B, fruit, snacks, and an opportunity to float in the Guadalupe River. Professional timing and photography, a great volunteer crew, hundreds of supportive spectators, and an electric finish line festival will showcase why the Kerrville Triathlon is one of the best triathlons in Texas.

The Kerrville Triathlon would like to thank sponsors H-E-B, ROKA, Clif Bar, City Limit Cycles, the City of Kerrville, Kerrville Convention and Visitors Bureau, Peterson Health, Jack and Adam’s Fredericksburg, Ben Phillips, Real Estate Advisor for Engel and Volkers Austin, SPIbelt, Peak Fitness, MO-RANCH, Hill Country Bicycle Works, Grape Juice, RunLab Austin, and Gatorade.

Introducing the Official Bike Mechanic for Kerrville Tri – James Balentine, owner of City Limit Cycles

Tune-up your bike and know how to change your own flat tire before race day. If you arrive in Kerrville and something occurred to your bike during transit, James and his City Limit Cycles van will be at your service during bike check-in on Friday and Saturday. James is also turning wrenches race morning (both days) should last-minute issues arise. He’ll set up shop at the southeast corner of T1 (off Guadalupe St.) Saturday and Sunday morning.

For more than two decades, James worked as a bike mechanic at bike shops, including a decade as Head Mechanic for Jack & Adam’s Bicycles in Austin. For the past 14 years, James has traveled the world volunteering as the mechanic at Triathlon World Championships for Team USA. He has also helped Olympians for Team USA Paratriathlon in Brazil and continues to volunteer for Team USA Paratriathletes.

James likes bikes. He likes to see and hear them running perfectly because he likes to see you riding them with a smile. His service experience is built around a lifetime passion for all things cycling. He’s been a pro racer, a pro mechanic, and pro-level bike geek.

Through it all, James brings a high level of professionalism and attention to detail. He has cared for all kinds of riders from recreational to pro and literally every kind of bike on the planet! Click To Tweet
City Limit Cycles is James’ mobile bicycle repair company. Now a world-class bike mechanic comes to your door so you can focus on what you love most – more saddle time. We’re lucky to have someone of his caliber at Kerrville Tri for the entire weekend. Follow City Limit Cycles on Facebook. and follow his bike cleaning advice!

Be prepared for the inevitable, learn how to change your tubular

Changing a tubular. Get ready for fun. Seriously! Many factors can lead to the need to change your tubular. Regardless of what happens, the fact remains, you still need to learn how. Make sure you have the materials below before beginning this process. Follow the directions and you’ll be cycling again in no time.

Materials needed:

  1. tubular tire (and wheel)
  2. clear glue, Hutchinson Tubular
  3. pump
  4. patience
  5. valve extender
  6. Teflon tape (used in plumbing)

Directions:

Before you begin to change your tubular, be sure to stretch out the new tire before trying to mount it on the wheel. You can do this by stepping on the inside of the tire and pulling the rest of the tire up towards you. You’ll hear it stretch. Using the Teflon tape, wrap the top of the Presta valve (after unscrewing the top of the valve) with Teflon tape. Now screw the valve extender onto the valve stem, making sure to leave the valve open. Take the glue and leave a bead of glue around the rim about 1/4 inch thick. Insert the valve through the valve stem hole. As you pull the tire down over the wheel be sure to stretch it and the tire should slip on the wheel. Inflate the tire to about 50 or 60 lbs. so the tire takes it shape. Let the wheel dry for 24 to 48 hours before riding. BE SURE TO INFLATE TIRE TO MAXIMUM PSI, for most conditions 140 is sufficient. Failure to inflate tires before riding could result in a race day crash. No one wants that.

Getting out of your wetsuit efficiently can save you time

You exit the water and are ready to head to transition, but first your wetsuit. Getting out of your wetsuit can be tricky, especially if you panic and don’t focus on the task at hand. This will slow you down and lead to an extended stay in transition. Use the tips and steps below to ensure a smooth wetsuit removal.
 

3 Steps to Follow

1. Begin by releasing the Velcro closure on your collar. Take your opposite hand and slowly use the ripcord to pull down on the wetsuit. Imagine that you are unzipping your wetsuit in slow motion. Fast, uncontrolled jerks will add time to this process and only slow your transition.
 
2. Start to turn the wetsuit inside out. This entire process can be completed while you are exiting the water and finding your bike in transition. Your wetsuit should be rolled down and hanging off your waist by the time you reach your bike rack.
 
3. When taking off the bottom portion of the wetsuit, remember to use your arms. Do not use opposite legs when getting out of your wetsuit. Standing on the wetsuit could cause pavement, sand, or any other surface to puncture the wetsuit.
 
Learn more about taking care of your wetsuit, including how to properly put it on in our blog post entitled Getting into Your Wetsuit.

If you are considering using a wetsuit for a triathlon, there is a lot to know going into it. Be sure and review the rules and research the water temp where you will be swimming. Wetsuits can be a big investments and a little tricky to start out so, if you are having trouble or this is your first time, read the steps below on how to get into your suit properly without damaging it.

CAUTION: When getting into your wetsuit, sharp objects can penetrate the rubber of your performance wetsuit. Long fingernails and other sharp objects could make small cuts in the surface of your wetsuit if caution is not exercised. These small cuts are not covered under the manufacturer warranty and are the responsibility of the owner. When trying on a wetsuit, it is best to clip fingernails and/or to be especially aware of your nails.

9 Steps to make putting on a wetsuit easier:

1. Step into the suit with the zipper facing behind you.

Image result for putting on wetsuit

2. If you are having trouble getting the wetsuit over your foot, you can put a plastic grocery bag over your foot and then pull on the wetsuit. Pull the legs of the wetsuit about 1-2 inches above your ankle.

3. Raise the fabric up around your waist. Work the wetsuit towards your crotch area until all air pockets have disappeared. For an ideal fit, the wetsuit should feel snug and almost tight around the waist and legs.

4. Lift the wetsuit up around your arms or shoulders depending on the wetsuit model.

5. For a full suit (long sleeve), pull the sleeves 1-2 inches past your watch or wrist area. When pulling on the sleeves, pull on the rubber between the elbow and shoulder.

6. To maximize the range of motion and comfort in the water, it’s important to take your time fitting the arms. Point your arms to the sky and start working the material towards your shoulder. The fit is correct when there is no gap between the wetsuit and your armpit. Excess rubber should reside above the shoulder. Repeat for both arms.

7. Have a second person zip and secure the collar. Ask the person assisting you to be careful that the zipper does not catch in the protective back flap. Having another person secure the back mechanisms will prolong the life of the rubber and help prevent your zipper from getting stuck in the closed position.

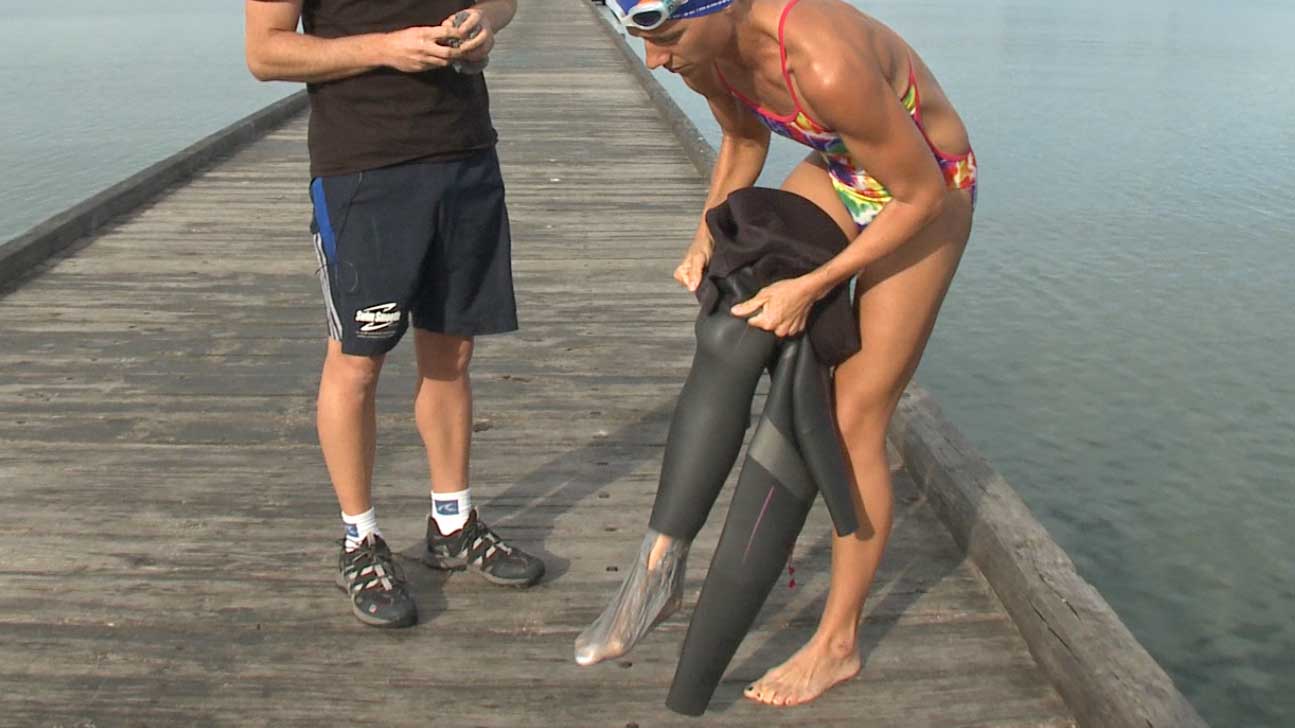
8. The wetsuit should feel tight around your neck causing the wetsuit to move with the neck. If your neck moves freely inside of the wetsuit, readjust the collar. If you choose to use lubrication products, make sure it is a non-petroleum based lubricant.

9. A proper fit should feel almost uncomfortably tight out of the water. The suit will naturally expand and become more comfortable once in the water and in a proper swimming position.


Follow these steps and getting into your wetsuit will get easier over time. The advice will also help prolong the life of your wetsuit. Take care of it and it’ll take care of you, be sure to wash it and hang dry! After you swim be sure to follow these steps to get out of your wetsuit and be sure to follow our care tips after.

You should strive for a clean drivetrain

While you’re hanging around this summer, why not try your hand at making sure you have a clean drivetrain? With these simple steps, you’ll be the grease monkey you always dreamed of being! Not only that, but keeping your drivetrain clean and lubed extends the life of your bicycle and helps maintain proper shifting performance and pedaling efficiency.

Steps:

1. When riding primarily on roads, you should clean and re-lube your chain at least once every three or four rides, depending on the conditions (rain, excessive road grit, etc.).

2. Run the chain backward through a clean cotton rag until the chain is fairly clean and dry. Lube the chain with your favorite lube, making sure that some lube gets on each link. Run chain back through the rag once more to remove excess lube. Don’t have a favorite chain lube? Check out 2 of our favorites White Lightning Clean Ride or Bike Medicine Purple Extreme.

3. Clean the cassette or freewheel. You can “floss” the cassette or freewheel with a clean rag to remove built-up gunk. If it is really dirty, you may want to scrub the cassette or freewheel cogs with an old toothbrush and some de-greaser.

4.  Wipe off your front and rear derailleur. Afterward, spray the derailleur pivots with a light, penetrating lube.

5. Wipe off your chainrings from time to time with a clean rag. If they are really dirty, you may want to scrub them with an old toothbrush and some de-greaser.

6. Clean the rear derailleur jockey wheels from time to time with a clean rag to prevent the build-up of gunk.

Tips:

If your chain is really dirty, you may need to remove it to clean it properly. However, if you regularly follow the steps above, you will not need to do this. You can buy chain cleaning kits which run the chain through a solvent bath. You can also use a wide mouth soda bottle, Gatorade bottle, or old water bottle as a chain bath. Again, following the recommendations above should keep your drivetrain clean.

You should generally replace your chain every 2000 miles. If you wait longer than that, your old chain may begin to put undue wear on your cassette or freewheel. Don’t forget to wash your bike!

Happy cleaning!

James Balentine, owner of City Limit Cycles

We are excited to reveal this year’s finisher medal! Along with is awesome bling, participants who register before September 1st will receive a personalized bib and their guaranteed shirt size!

Watch the full video to see this year’s super soft tri-blend t-shirt and athletic trucker hat.

Camille Baptiste provides as much energy volunteering as she does racing

This month’s winner of the High Five Events‘ “Nomination Contest” is Camille Baptiste. She was nominated by her husband Woody. He says that if Camille is not racing, she is usually volunteering. Baptiste is known for putting “as much energy into volunteering as if she was racing herself.” To her, “race day is a big party,” and volunteers are a “key component to logistics.” For this reason, she believes that volunteers “amplify the competitors’ experience and help them achieve their goals.”

Camille Baptiste pumping up triathletes at 2018 Rookie Tri!

Camille Baptiste (far right) pumping up triathletes at 2018 Rookie Tri!

For about five years now, Camille Baptiste has volunteered at many of the High Five Events. According to Baptiste, The Rookie Tri holds a special place in her heart. Swim in/out is her favorite volunteer position because she gets to see and encourage everyone before the race.

Camille Baptiste loves to “be loud,” pass out high fives to everyone, and give back to the Austin athletic community. You’ll always see her with a smile on her face. She enjoys helping athletes having the best race experience they possibly can!

The next available volunteer opportunities are at Jack’s Generic Tri (8/26) and Kerrville Triathlon Festival (9/28-9/30).

The High Five Events’ “Nomination Contest” features volunteers who go above and beyond at one of our events. These phenomenal volunteers help us produce successful, safe, and fun events for athletes, volunteers, and staff. Know an outstanding volunteer? Fill out this short form and nominate them today!

Learn the difference between trainers and rollers

Bicycle trainers and rollers can come in handy when your training moves indoors. Many factors can force this switch, from weather to time restrictions. Price, skill level, usage, and ability can all factor into your purchasing process. Use the info below to your advantage when shopping for trainers and rollers.

Bicycle Trainers

A bicycle trainer is typically a tri-pod devise that secures the bike into a stationary riding position. The rear wheel is held off the ground by locking the skewer into the trainer. The front wheel is held off the ground by a riser block to make the bicycle level. Some riser blocks have multiple positions to simulate climbing or descending. There are three types of resistance to your wheel:

When talking trainers and rollers, magnetic trainers are the best bang for your buck.

Magnetic trainers are the best bang for your buck.

Wind – This affordable unit runs between $85 and $120, but expect a lot of noise. It is best used for short rehab stints, monthly rainy day riding sessions, or someone on a really tight budget. The noise from this type of trainer is caused by human force against the tire and from the small channels in the unit that catch air and add resistance. Due to the noise level, it is hard to watch television or listen to the radio while in use. Changing resistance levels is cumbersome because one must get off the bike to tighten or loosen the resistance to simulate different terrains. Although affordable, the parts of this unit are not created for heavy everyday use. Unnecessary wear to the rear tire will also occur when used daily.

Magnetic – Based on price ($125-$250), durability, and noise projection, this is the most practical unit of the three. It is not exactly like riding on the road, but similar enough. The mag trainer is set up like the wind trainer, but uses magnetic resistance instead of wind. This trainer allows for TV viewing and music listening.  The unit also stands up to multiple rides per week. It will simulate multiple terrains just by changing the gears of the bike. Some units come with a wired remote shifter to change resistance without getting off the bike.

With the magnetic trainer, cyclists get the most bang for their buck. Click To Tweet
Fluid – The most expensive of the three types of trainers is the fluid trainer. This unit best mimics the feel of being on the road. Prices range from $250 to $399 but will definitely stand the test of time. It is the most durable trainer because it is designed for serious indoor cyclists who will spend hours a day on it. The resistance of this unit is controlled solely with the shifters on the bike.

Bicycle Rollers

Wikipedia describes rollers as “a type of bicycle trainer which makes it possible to ride a bicycle indoors without moving forward. However, unlike other types of bicycle trainers, rollers do not support the bicycle. They normally consist of three cylinders, drums, or “rollers” (two for the rear wheel and one for the front), on top of which the bicycle rides. A belt connects one of the rear rollers to the front roller, causing the front wheel of the bicycle to spin when the bicycle is pedaled. The spacing of bicycle rollers can usually be adjusted to match the bicycle’s wheelbase. Generally, the front roller is adjusted to be slightly ahead of the hub of the front wheel.”

When deciding between trainers and rollers, know that rollers require more skill.

Rollers require great balance and handling awareness.

Like trainers, rollers also come in different levels, but they all use the same type of resistance – human resistance.  The main reason to use rollers is to work on bike handling skills. Rollers increase handling skills by increasing balance on the bike. This is crucial for draft-legal racing and riding in tight quarters. Rollers take a constant state of awareness while in use. The price of rollers (between $175 and $399) is determined by the type of material from which the drums are made – aluminum or plastic.  Aluminum rollers cost a little more but will last longer. Plastic rollers will generally not last as long and will also wear the tire out quicker.
Both trainers and rollers have their purpose in the sport of triathlon. Trainers are more practical for everyday use because they meet the needs of the fitness cyclist: set the bike up, pop in a movie and ride. They are safer (than rollers) and easier to use for a large number of people positioned in one place. They are a good replacement for getting a nice ride on the road. Rollers, on the other hand, are more of a tool than a ride replacement device. They are used for serious cyclists to help increase cadence efficiency and balance on the bike. Rollers are not recommended for beginner cyclists because of the safety factor. Both trainers and rollers are foldable and easy to store.
Common brands:  Cycle-Ops, Wahoo Kickr, and Kinetic

Many people don’t realize that a few millimeter adjustments can make a huge difference on how they feel on their bike. If you have the feeling like you are not making gains or if you have pains after riding, you may want to try adjusting your saddle height.

What is Saddle Height?

The saddle height is the distance between the heart of the pedal axle and the top of the saddle.

Saddle height is set by adjusting the seat post to an ideal height that balances comfort and power on the bike.

Why Change?Kerrville Triathlon adjust saddle height

Saddle height is arguably the single most important adjustment on your bicycle. Incorrect saddle height can contribute to saddle discomfort, anterior and posterior knee pain, poor leverage, and ultimately limiting power production. When you are doing your best to fuel your body, you may be losing power other ways like incorrect saddle height.

Ways to Set Your Saddle Height

There are many methods and formulas to derive at “proper” saddle height. One of the best approaches is to establish it based on the rider’s individual ride characteristics and flexibility.

Today’s technological influences impact shoe, cleat, and pedal contact points so dramatically that it is important to have your saddle height evaluated by a knowledgeable and qualified bike fit specialist. Click To Tweet

If you are looking for recommendations, you can visit with Josh at Jack & Adam’s Fredericksburg or with the crew over at Mellow Johnny’s.

A bike fit specialist can detail in what way your individual characteristics and equipment may be contributing to any performance or biomechanical limitations.

If you can’t make it to a bike fit there is still a solution. Before your next ride if you want to experiment at home you can follow the “heel to pedal method”. This will get you in the ballpark range before you can see a professional.

Bit fitting saddle height

First, mark the current height.

Then, put your bike on the trainer. Pedal around to make sure you are in the position you normally ride in. Place your heel on the pedal and pedal backward to reach the six o’clock position. Your knee should be completely straight.

If you are having trouble making contact with your pedal with your heel – the seat is too high. If your knee is bent – it is too low.

Make very small adjustments, in millimeters until your leg is straight with the heel on the pedal.

Adapting to Your New Saddle Height

Once a proper height is found, wrap a strip of electrical tape around the base of the post where it meets the seat clamp.

Take measurements and record in a safe location for future reference.

Make the first few rides out on your new saddle height short and sweet. It can take a few rides before your body is adapted.

If you experience any new pains be sure to follow up with the person who did your bike fit. Do not ride through the pain. Click To Tweet

It is good to get your bike fit looked at at least every few years or if you get new equipment such as new shoes or pedals. Check here to see how often you should replace some of your gear.

Ride Happy!