Why Creating a Relay Team is The Best Way to Tri
Just when you thought Kerrville Tri couldn’t get any more fun, now you can make it a team effort! Recruit friends, family, or co-workers and create your relay team for Kerrville Triathlon’s 10th-anniversary celebration this September 26-27! The 10th annual tri takes place in the heart of the Texas Hill Country, Kerrville, Texas, with scenic views guaranteed. Relay teams can consist of two or three individuals to help you divide and conquer your upcoming tri while having a blast in the process! Check out a few reasons why relay teams are a great way to get into triathlon and why you should create a team for this year’s Smokin’ Good Tri.
Try something new
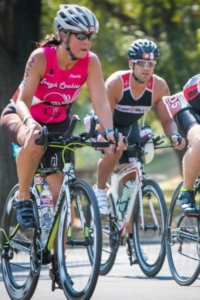
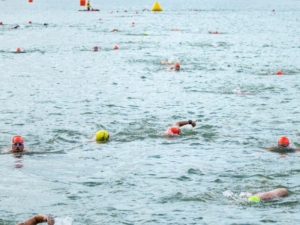
Maybe you know about triathlon, maybe you’re new to the scene. Perhaps you’ve cheered and supported friends at their triathlons, but you’ve never participated in one. Creating a relay team is the best way to get introduced to the sport! Everyone experiences pre-race nerves, especially if it is your first time ever completing a tri! That’s why building a relay team of two or three will help take some of the pressure off so you can focus on the fun. Split the tri three ways, or if your team has two members, one person does the swim, while the other person does the bike and the run. Depending on your individual skill levels, this can be accomplished in any combination. Train with your team, experience the highs and the lows, and get a taste of your new favorite sport.
The more the merrier
You can always get one friend to tri along with you, but why do that when you can triple the fun?! A three-person relay team is triple the action so, get two friends or co-workers to create your relay team. Here are a few ways to take your team spirit to the next level during your training!
- Create a sweet team name
- Make custom gear to show your team spirit during training
- Start thinking about what your team will wear on race day
- Come up with a team motto
- Have fun with it!
What feel is your team going for? Will your team opt for funny costumes for laughs out on the course? Or some matching outfits to show your fellow triathletes your team means business! With so many choices, your team will love this. And it’s a great way to really get you excited to keep working towards your goal.
You could use the help
Injuries happen. No matter what lengths you go to to stay safe during training, sometimes they just happen. But are you going to let that stop you from achieving your fitness goals? Not so fast! An injury that may prevent you from swimming might not stop you from cycling or running. creating a relay team for Kerrville Tri to test your boundaries during your team training sessions is a great way to stay active while continuing to strengthen your muscles! Just be sure you’re comfortable and aren’t in pain when training. You never know, cross-training might just help speed up your recovery!
 Making memories
Create a relay team that brings your buddies back together to make some unbeatable memories. Get the old high school/college crew together. Make it a family affair and create an all-sibling team, or give the ‘rents a challenge you know they won’t be able to refuse! Take on a new challenge with your run group and create a relay team as a way to expand your fitness routine. Whatever direction you go, make this something you won’t soon forget. Participating with loved ones by your side and cheering you on, creating a relay team will make your Kerrville Tri experience unlike any other.
Push Your Limits
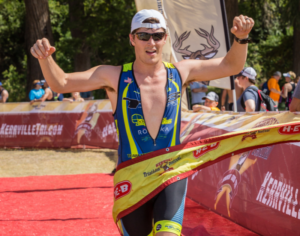
Triathlon is a fun way to push your body’s limits, but we know making time to train for three sports can be difficult on top of everything else life throws your way. If you have a tight schedule and know you won’t be able to properly train for multiple disciplines, focus on one or two disciplines to push your limits! Find someone who swims like a fish in the water. Add a member who gets speeding tickets on their bike for going too fast. Pick a runner whose feet seem to never touch the ground because of their speed. Assemble this super team and hold each other accountable to keep up with training! Before you know it, you’ll be ready to show up on race day ready to set some new records or even take home 1st place!
Whatever your reason for creating a relay team, there are two things left to do: build your team to divide and conquer Kerrville Tri and register!