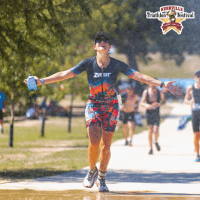
Race week is here! This guide contains a one-stop review of most of the information you will need to know for the Kerrville Tri. If you can’t find what you are looking for, please check the other pages on our website for more detailed information.
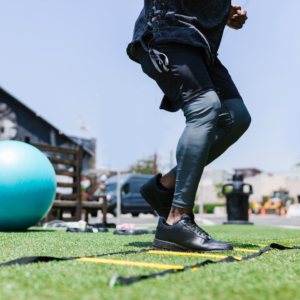
Race day is almost here, and whether you’re a seasoned triathlete or gearing up for your first go at the Kerrville Triathlon, every second counts! One of the easiest ways to shave off valuable minutes is by improving your transition times. Think of transitions as the “fourth discipline” of triathlon, where a little planning and efficiency can make a big difference.
This year, we’re adding extra motivation to perfect your transitions with a special incentive: the athletes with the fastest T1 and T2 times will win the coveted T1 and T2 Prime! The prize? A limited edition Kerrville Tri Yeti Tumbler. So, read on, get organized, and aim to be the fastest out there on race day!
Here’s how you can master the art of quick transitions:
1. Know Your Layout
Before the race, take some time to walk through the transition area. Know exactly where your bike is racked and how to navigate from the swim exit to your bike, and from your bike to the run. Familiarity will save you from those frantic, disoriented moments on race day.
2. Minimize Gear, Maximize Speed
Keep your transition area clean and simple. Lay out only what you absolutely need in the order you’ll use it. Think quick: helmet first, sunglasses, then bike shoes. Less clutter means less chance of fumbling around. Have a plan for fueling on the bike or during the run to keep your transitions as seamless as possible. Be sure to read through our Navigating Transitions page for more details on the rules of what is allowed in T1 & T2.
3. Quick-Dry Essentials
Invest in a quick-drying towel for a fast foot wipe and quick-dry gear that lets you hit the ground running. Every second you spend trying to dry off is a second that someone else is already biking or running!
4. Elastic Laces are a Game Changer
If you haven’t switched to elastic laces for your running shoes yet, now’s the time. They allow you to slide your shoes on in seconds without having to fumble with knots and bows.
5. Bike Shoes: The Velcro Advantage
Consider bike shoes with easy-to-secure Velcro straps rather than buckles or laces. Velcro allows for a quick fastening and gets you out of the transition area and onto the course faster.
6. Practice, Practice, Practice
Set up a mock transition area at home and practice running through each step. Time yourself to get a sense of how fast you can realistically go. The more familiar you are with the process, the smoother and faster it will be on race day.
7. Stay Calm and Focused
Adrenaline will be pumping, and it’s easy to rush through transitions only to realize you forgot something crucial. Take a deep breath, focus on the task at hand, and stay calm. A steady approach often beats a rushed and frantic one.
8. Know the Rules
Each race can have slightly different rules about what is allowed in the transition area. Check the Kerrville Triathlon guidelines so you’re not caught off guard by any surprises that could slow you down.
9. Visualize Your Success
Take a few moments before the race to close your eyes and visualize smooth, quick transitions. Mental rehearsal can build confidence and set you up for a strong performance.
Transition times might seem like a small part of the race, but those seconds add up. By streamlining your gear, practicing your routine, and staying focused, you’ll be ready to slice precious time off your race and maybe even hit that personal best you’ve been chasing. Remember, transitions are all about flow—so get in the zone, stay cool, and transition like a pro!
See you at the start line—let’s make those transitions fly! 🏊♂️🚴♂️🏃♀️💨
 The run segment of the Kerrville Triathlon is where the race is often won or lost. After the swim and bike legs, your legs might be feeling the burn, but this is where you push through. Whether you’re a first-timer or a seasoned triathlete, mastering the run with some Kerrville-specific tips will help you cross that finish line with a smile. Let’s dive into the key do’s and don’ts to ensure your run is as effective and enjoyable as possible.
Let’s talk about one of the coolest additions to your bike that can make you feel like you’re flying down the road: aero bars! If you’ve ever wondered what those extra handlebars sticking out of some bikes are, why people use them, and whether you should get a pair, you’re in the right place. Let’s dive in!
What Are Aero Bars?
Aero bars, also known as aerobars, are handlebar extensions that allow you to ride in a more aerodynamic position. They extend forward from your handlebars, letting you lean forward and tuck your body into a streamlined position. This reduces wind resistance, helping you go faster with less effort – perfect for those long triathlon rides!
Types of Aero Bars
-
Clip-On Aero Bars:
- Perfect for Beginners: These bars attach to your existing handlebars. They’re great for those just starting because you can remove them if you decide aero bars aren’t your thing.
- Versatility: Use them when you need extra speed, and take them off when you’re just cruising around.
-
Integrated Aero Bars:
- Built-In: These are part of a bike’s design and are usually found on high-end triathlon and time trial bikes.
- Enhanced Aerodynamics: Offers a sleeker, more aerodynamic setup but can be a bigger commitment.
Why Do People Use Aero Bars?
- Speed: The main reason – they make you faster by reducing drag. In a triathlon, every second counts!
- Comfort: Believe it or not, they can also make long rides more comfortable by distributing weight differently and reducing pressure on your hands and wrists.
- Efficiency: Allows for a more efficient use of energy, crucial for saving strength for the running leg of your triathlon.
Pros and Cons of Aero Bars
Pros:
- Increased Speed: Significant improvement in speed and reduced effort.
- Comfort: Better weight distribution and less strain on the hands.
- Efficiency: Helps conserve energy for the running portion of a triathlon.
Cons:
- Control: Takes time to get used to steering and balancing in the aero position.
- Cost: Can be an additional expense, especially for integrated systems.
- Fit: Proper fitting is crucial, which can require professional help.
Getting Fitted for Aero Bars
Fitting aero bars correctly is essential. Here’s how to get it right:
- Professional Bike Fit: Investing in a professional bike fitting can make a world of difference. A professional will adjust the aero bars to match your body’s ergonomics, ensuring comfort and efficiency.
- DIY Fit Tips:
- Arm Position: Your elbows should rest comfortably on the pads, with your arms parallel to the ground.
- Reach: Adjust the length of the bars so you can reach the shifters without straining.
- Angle: Keep your body in a relaxed, natural position to avoid unnecessary strain.
Aero bars can be a game-changer for triathletes, offering speed and comfort advantages that can help you crush your personal records. Whether you’re just starting or looking to up your game, they’re worth considering. Take the time to get fitted properly and practice riding in the aero position to maximize your performance at the Kerrville Tri.
Competing in the Kerrville Tri 2024 is an exciting challenge that demands peak performance across swimming, biking, and running. Among these, biking is a critical segment where you can gain a significant edge by increasing your mileage. Whether you’re a seasoned triathlete or a newcomer, the right approach to boosting your bike mileage can make a world of difference. Let’s dive into effective strategies to prepare your legs and lungs for those extra miles!
 Set Realistic Goals
Before you start ramping up your mileage, it’s essential to set realistic and achievable goals. Assess your current fitness level and determine a target mileage that you can gradually build up to without risking injury. Break down your ultimate goal into weekly or monthly increments to maintain steady progress.
Build a Structured Training Plan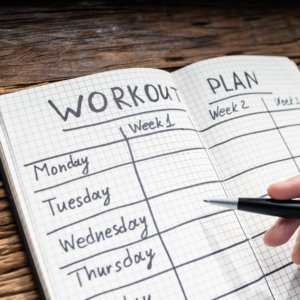
A structured training plan is the backbone of increasing your bike mileage. Consider incorporating the following elements:
- Base Miles: Start with a solid foundation of base miles. These are longer, steady rides at a comfortable pace to build endurance.
- Interval Training: Integrate interval training sessions to improve your speed and power. Alternate between high-intensity bursts and recovery periods.
- Long Rides: Dedicate one day a week to a long ride that gradually increases in distance. This simulates race conditions and enhances stamina.
- Recovery: Allow adequate recovery time to prevent burnout and overtraining. Include rest days and light recovery rides in your plan.
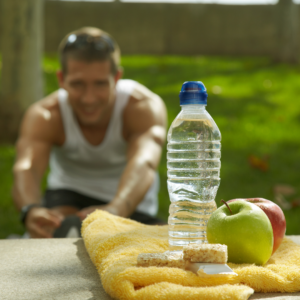 Focus on Nutrition and Hydration
Fueling your body properly is crucial for sustaining longer rides. Prioritize a balanced diet rich in carbohydrates, proteins, and healthy fats. Stay hydrated before, during, and after your rides. Consider using sports drinks or gels for longer sessions to replenish electrolytes and energy.
Invest in Quality Gear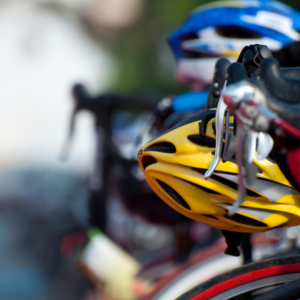
The right gear can significantly impact your performance and comfort. Ensure your bike is well-maintained and fits you correctly. Invest in quality cycling shorts, shoes, and a helmet. Aerodynamic gear and accessories, such as a bike computer, can also help monitor your progress and enhance your training efficiency.
 Incorporate Cross-Training
While biking is the focus, incorporating cross-training activities like swimming, running, and strength training can boost overall fitness and prevent monotony. Strengthening your core and leg muscles through targeted exercises will improve your cycling power and endurance.
Join a Cycling Group
Cycling with a group can provide motivation, support, and valuable tips from experienced riders. Group rides often push you to ride longer and faster than you might on your own. Plus, the camaraderie and shared experiences make training more enjoyable. Try our sponsor and favorite bike store Bicycle House for their Saturday morning group ride at 8AM.
 Monitor Your Progress
Keep track of your mileage, speed, and overall progress using apps or a training log. Regularly reviewing your performance data helps identify areas for improvement and celebrate milestones. Adjust your training plan as needed based on your progress and any challenges you encounter.
Listen to Your Body
Pay attention to your body’s signals. If you experience pain or fatigue, it may be a sign to take a break or adjust your training intensity. Pushing through pain can lead to injury, derailing your progress.
Increasing your bike mileage for the Kerrville Tri 2024 requires a balanced approach of consistent training, proper nutrition, quality gear, and mindful recovery. By setting realistic goals and following a structured plan, you’ll be well on your way to conquering the bike segment of the triathlon and achieving your personal best.
Triathlons come in various distances, each presenting unique challenges and rewards. Among them, the Half Iron distance, also known as a 70.3 triathlon, stands out for its balance of endurance and speed. This guide will explain what a Half Ironman is, the origins of its name, and how different triathlon distances are categorized.
What is a Half Iron Distance?
A Half Iron triathlon, also known as a 70.3 triathlon, consists of:
Swim: 1.2 miles (1.9 kilometers)
Bike: 56 miles (90 kilometers)
Run: 13.1 miles (21.1 kilometers)
The total distance covered is 70.3 miles, which is why it is commonly referred to as a 70.3 triathlon. This race format is popular among triathletes looking for a significant challenge beyond the Olympic distance but not as demanding as a full Iron distance event.
Understanding the Trademark and Naming Conventions
The term “Ironman” is a registered trademark of the World Triathlon Corporation (WTC). This trademark encompasses their series of long-distance triathlon races, including both full Ironman and Ironman 70.3 events. Due to this trademark, other race organizers must use different names for similar distances.
Non-Ironman branded events often use terms like “Half Iron” or “middle distance” to describe the 70.3-mile race. These names help distinguish the events while still conveying the race’s challenge and scale.
Different Triathlon Distances Explained
Triathlons come in a range of distances to accommodate athletes of all experience levels. Here are the most common race formats:
1. Sprint Distance:
Swim: 0.5 miles (750 meters)
Bike: 12.4 miles (20 kilometers)
Run: 3.1 miles (5 kilometers)
Ideal for beginners, Sprint triathlons offer a fast and intense race experience.
2. Olympic Distance:
Swim: 0.93 miles (1.5 kilometers)
Bike: 24.8 miles (40 kilometers)
Run: 6.2 miles (10 kilometers)
The Olympic distance, also known as the standard distance, is featured in the Summer Olympics.
3. Half Iron Distance:
Swim: 1.2 miles (1.9 kilometers)
Bike: 56 miles (90 kilometers)
Run: 13.1 miles (21.1 kilometers)
This distance offers a substantial endurance challenge, perfect for athletes moving up from the Olympic distance.
4. Full Iron Distance:
Swim: 2.4 miles (3.8 kilometers)
Bike: 112 miles (180 kilometers)
Run: 26.2 miles (42.2 kilometers)
The ultimate test of endurance, the full Iron distance requires extensive training and preparation.
Why Choose a Half Iron Distance?
The Half Iron distance is ideal for athletes looking to push their limits without the extensive time commitment required for full Iron distance training. It provides a significant endurance challenge and can serve as a stepping stone for those aspiring to complete a full Iron distance triathlon in the future.
Half Iron Distance Races in Texas
Texas is home to several high-quality Half Iron distance races, offering diverse landscapes and unique challenges. Some notable events include:
1. Ironman 70.3 Texas (Galveston, TX):
– Set along the Gulf Coast, this race features a saltwater swim, a flat bike course, and a scenic run along the seawall.
2. Ironman 70.3 Waco (Waco, TX):
– Known for its scenic Brazos River swim, this race also includes a rolling bike course and a run through historic Waco.
3. Kerrville Triathlon Festival (Kerrville, TX):
– Located in the beautiful Texas Hill Country, this event offers a swim in the Guadalupe River, a challenging bike ride through rolling hills, and a run along the Kerrville River Trail.
Why Race the Kerrville Triathlon Half?
The Kerrville Triathlon Festival stands out for several reasons, making it a top choice for Half Iron distance enthusiasts:
1. Scenic Course:
– The swim takes place in the clear waters of the Guadalupe River, providing a refreshing start to the race. The bike course winds through the picturesque Texas Hill Country, featuring rolling hills and stunning vistas. The run course follows the Kerrville River Trail, offering scenic views and a supportive atmosphere.
2. Well-Organized Event:
– The Kerrville Triathlon Festival is known for its excellent organization and attention to detail. From packet pickup to post-race festivities, every aspect of the event is designed to provide a smooth and enjoyable experience for participants.
3. Community Support:
– The local community in Kerrville comes out in full force to support the athletes, creating an encouraging and vibrant race environment. The friendly atmosphere and enthusiastic volunteers make this race a memorable experience.
4. Festival Atmosphere:
– The event includes a weekend-long festival with activities for athletes and their families. From kid’s fun run to health and fitness expo, and boutique shops around town, there’s something for everyone to enjoy.
5. Awesome Swag:
– Participants in the Kerrville Triathlon Half receive high-quality race swag that adds to the excitement and sense of accomplishment. Each athlete gets a stylish race shirt, a cool hat, a durable water bottle, and a convenient bag. And for finishers, the coveted belt buckle medal serves as a unique and cherished memento of their achievement.
Tips for Training and Preparation
Training for a Half Iron distance triathlon requires a well-structured plan that balances swim, bike, and run workouts, along with adequate rest and recovery. Here are some key tips:
1. Build a Solid Base: Start with a strong foundation in each discipline before increasing your training volume.
2. Incorporate Brick Workouts: Practice transitioning between disciplines to get your body used to the demands of race day.
3. Prioritize Nutrition: Develop a nutrition strategy that works for you, both during training and on race day.
4. Listen to Your Body: Pay attention to signs of overtraining and allow yourself ample recovery time.
Whether you’re an experienced triathlete or a newcomer seeking a new challenge, the Half Iron distance offers an exciting and rewarding race experience. Understanding the different triathlon distances and the origins of their names can help you choose the race that’s right for you and ensure you’re well-prepared for your next adventure.
Are you ready to conquer the downhill segment of the Kerrville Triathlon like a pro? Riding downhill can be exhilarating, but it also presents unique challenges that require skill and technique to navigate safely and efficiently. Whether you’re a seasoned cyclist or new to the sport, mastering the descent is essential for achieving your best performance on race day. In this blog post, we’ll cover some expert tips and strategies to help you ride downhill with confidence and control.
1. Body Positioning: Proper body positioning is crucial for maintaining stability and control while descending. Shift your weight slightly back on the bike, keeping your arms relaxed and elbows bent. Lower your center of gravity by bending your knees and dropping your heels, which will help you maintain balance and stability on the bike.
2. Look Ahead: Keep your eyes focused on the road ahead, scanning for potential hazards such as potholes, gravel, or sharp turns. Look through the corners and anticipate your line, allowing you to plan your trajectory and adjust your speed accordingly. Maintaining a forward gaze will help you stay balanced and react quickly to changing conditions on the descent.
3. Brake Control: Effective braking is essential for controlling your speed on the descent. Use both your front and rear brakes simultaneously, applying gentle, steady pressure to avoid locking up the wheels. Feather the brakes to modulate your speed, especially on steep or technical descents where maintaining control is critical. Practice braking on different surfaces and gradients to develop a feel for optimal braking technique.
4. Cornering Technique: Cornering on descents requires precision and finesse to navigate tight turns safely. Approach corners wide to maximize your line and reduce the need for sudden braking. Lean your bike into the turn while keeping your body upright, allowing your tires to maintain maximum grip on the road. Accelerate gently out of the corner, using your momentum to carry you through the turn smoothly.
5. Stay Relaxed: Finally, remember to stay relaxed and confident on the descent. Tension in your body can lead to instability and loss of control, so focus on staying loose and fluid on the bike. Trust in your skills and training, and enjoy the thrill of riding downhill at speed.
By incorporating these tips into your training regimen, you’ll be well-equipped to tackle the downhill segment of the Kerrville Triathlon with skill and confidence. Practice descending on different terrain and conditions to build your confidence and hone your technique. With proper preparation and technique, you’ll be ready to fly downhill and crush the competition on race day!
Welcome to the first installment of our seven-part series where we’re going to turn you into a cycling talent, just in time for the Kerrville Tri! And today, we’re starting with a topic that makes many cyclists quake in their cleats—hill riding!
But fear not! The hills on the Kerrville Tri course are more like gentle waves than the towering peaks you might picture when you think of the Texas Hill Country. So, let’s saddle up and learn how to ride these rollers with style and a smile!
Find Your Groove on the Go
- First things first, when you see that hill approaching, don’t go charging up like a bull at a gate. Ease into it and find a groove that feels like you could keep spinning for days. Get your gear game on point so you can maintain a happy cadence without turning your legs into jelly.
Get Comfy with the Climb
- Your bike isn’t just a machine; it’s an extension of you! Lean in like you’re telling it a secret and keep your peepers peeled on the prize ahead—not down at your dazzling shoes. Stay loosey-goosey with your grip and shrug off those shoulder gremlins. Keep it chill, and you’ll save energy for the party at the peak.
Breathe Like You Mean It
- Inhale the courage, exhale the doubt. Keep that oxygen flowing to feed your mighty muscles. And remember, tension is the enemy of fun—so keep it light and breezy, both in spirit and on the handlebars.
Stand and Deliver (But Not Too Much)
- Time to rise up! But hold your horses—this isn’t a standing ovation. Use your stand-up power moves for those short, grumpy gradients that need a little extra oomph. Pro tip: click into a tougher gear before you stand to avoid that awkward wobble.
Clip In and Pull Up
- Ah, the magic of clipless pedals! They’re not just there to make walking a comedic event. Use them to your advantage by pulling up as well as pushing down when you climb. It’s like having a secret leg army helping you out.
Specificity is Key
- Want to be a hill boss? Train like one. Find a hill that mimics what you’ll face in the triathlon and do repeats until you know every inch of that slope like the back of your hand—or tire.
Pacing is Everything
- It’s a triathlon, not a sprint up Mount Everest. Keep your inner speed demon in check and pace yourself. There’s no shame in holding back a bit to save some zest for later.
High-Five Yourself at Every Peak
- You’ve made it to the top—give yourself a mental high-five! Each hilltop fiesta builds your confidence and keeps the good vibes rolling.
So there you have it, —the first chapter in your epic saga of becoming a cycling machine! Stay tuned for more cycling sorcery in our next post, and remember, the Kerrville Tri hills ain’t got nothing on you!
Training for a triathlon like the legendary Kerrville Triathlon is no small feat, especially when you have to balance it with the other thousand things in your life. But don’t sweat it—well, at least not about the scheduling part. Here are five essential tips to help you maintain equilibrium between your training and your everyday responsibilities!
1. Embrace the Magic of Morning Workouts
Let’s face it, not everyone is a morning person, but getting your training done early can be a game changer. Starting your day with a swim, bike, or run not only ticks your training box but also boosts your mood and energy for the day ahead. Plus, it’s one less thing to worry about when work or family duties expand unexpectedly. Set that alarm and have your gear ready to go—it’s worth it!
2. Plan Like a Pro
Fail to plan? Plan to fail! Keep a sharp eye on your weekly schedule by using a planner or an app dedicated to managing your time. Slot in your training sessions like any other critical appointment. Remember, a visual representation of your week not only helps prevent overbooking but also keeps you accountable.
3. Mix Socializing with Training
Who says you can’t mix a bit of fun with your training? Instead of a coffee catch-up, why not a catch-up on the run? Or a family outing on bikes? Incorporating social aspects into your training can make it more enjoyable and less of a chore. This way, you’re hitting two birds with one stone—staying connected with your loved ones and sticking to your training plan!
4. Listen to Your Body
The drive to stick to your training plan can sometimes lead you to ignore the signs your body is giving you. Overtraining can lead to injuries and burnout. Make sure to listen to your body and incorporate rest days into your schedule. Remember, rest and recovery are just as important as the training itself for your performance and overall health.
5. Use Technology to Your Advantage
There’s a tech tool for nearly everything these days, including triathlon training. From fitness trackers that monitor your progress to apps that design workout plans and nutrition guides, technology can be a lifesaver. Use these tools to stay on track, monitor your fitness levels, and make informed decisions about your training and recovery.
Balancing life and training for the Kerrville Triathlon doesn’t have to be a stressful endeavor. With a bit of planning, the right attitude, and the use of modern tech, you can enjoy the journey and cross that finish line with a smile! With these tips and tricks, you’re set to make your triathlon training a part of your well-balanced life. Dive in, pedal hard, and run towards your goals with enthusiasm and a well-planned schedule!
Fear not! Your dream of crossing that finish line in glory doesn’t have to be a budget-buster. This guide will navigate through various strategies to significantly reduce the costs associated with preparing for and participating in a triathlon, ensuring your focus remains on reaching your goals without draining your wallet.
Strategically Choosing Your Races
- Early Registration Rewards: Securing your race spot during the early registration period isn’t just smart planning—it’s a savvy financial move. These early bird rates can significantly lower your entry fees, serving as an upfront investment in your training motivation and your financial peace of mind.
- Local Races for the Win: Embracing local events not only fosters community spirit but also significantly cuts down on travel expenses. The Kerrville Triathlon Festival itself offers a spectacular race experience right in your backyard, proving that you don’t need to venture far to chase your triathlon dreams.
- The Magic of Mid-Distances: While the allure of full-distance triathlons is undeniable, mid-distance races like the Kerrville Half offer a compelling blend of challenge and affordability. These events provide the thrill of competition and the satisfaction of achievement without the hefty price tag associated with longer distances, making them an ideal choice for both budget-conscious beginners and seasoned athletes.
Economical Training Approaches
- Find Your Pack with Austin Tri Club: Joining a community like the Austin Tri Club can transform your training journey. The club offers free weekly workouts exclusively for its members, providing not only a structured training regimen but also the invaluable support of fellow triathletes. It’s an excellent way to stay motivated and improve, all while keeping costs low.
- Leverage AI for Coaching: In the age of technology, personalized training plans need not come with a hefty price tag. Using AI, like ChatGPT, you can request a tailored training program. For example, you could input, “Create a 12-week beginner triathlon training plan focusing on improving swim technique and building endurance for a half-distance race.” This modern approach provides a cost-effective alternative to personal coaching, offering customized advice and structured plans at no expense.
Smart Gear Acquisition
- Borrow Before You Buy: Leveraging your triathlon network to borrow gear not only saves money but also allows you to test different products before committing to a purchase. This strategy can significantly reduce your initial investment and also strengthen community bonds through shared resources.
- Pre-Owned and Rental Gems: Exploring second-hand markets or rental options for high-quality triathlon gear can be a game-changer. It offers the opportunity to access top-tier equipment at a fraction of the cost, ensuring you’re race-ready without the financial burden of brand-new purchases.
Nutrition on a Budget
- Embrace Official Race Nutrition: Familiarizing yourself with the nutrition provided during your race can streamline your training and race day strategy, eliminating the need for personal trial and error—and the costs associated with it. This approach not only optimizes your performance but also your budget, by reducing the need for purchasing additional nutrition.
- Bulk Buying and Meal Prepping: One of the most effective ways to manage nutrition costs is through bulk purchasing and meal prepping. Buying in bulk can significantly lower the price per serving of many staples in a triathlete’s diet, such as rice, pasta, and legumes. Combined with meal prepping, it ensures you have nutritious, ready-to-eat meals and snacks throughout the week, saving time and preventing costly last-minute food purchases.
Savvy Travel and Accommodation
- Carpool and Community Stays: Sharing travel expenses with fellow athletes not only cuts down on costs but also enhances the overall race experience by building camaraderie. Furthermore, exploring community hosting options like couch surfing can provide affordable lodging solutions that deepen your connection to the triathlon community.
- Smart Hotel Choices: Proactively reaching out to the host hotel for special rates or exploring alternative accommodations like camping or vacation rentals can offer unique and budget-friendly lodging experiences. These options not only save money but also can add a memorable adventure to your race weekend, making your experience stand out.
Extra Savings Strategies
- Be Alert for Deals: Keeping a vigilant eye on social media, newsletters, and triathlon forums can uncover unexpected deals and discounts on race entries, gear, and accommodations. This proactive approach can lead to significant savings, allowing you to allocate resources elsewhere in your training or personal life.
- Simplify Your Gear: Adopting a minimalist approach to triathlon gear, focusing on quality essentials over quantity or the latest technology, not only saves money but also streamlines your training and race day preparation. Investing in versatile, high-quality items that serve multiple purposes can enhance your performance without cluttering your space or draining your finances.
Triathlons are as much about the journey as they are about the finish line. With the right strategies, this journey can be made more accessible, allowing you to focus on what truly matters: pushing your limits, achieving your goals, and enjoying the community that comes with this incredible sport.