Tag Archive for: Kerrville Triathlon

Look your best in your Kerrville Tri race day photos with these great tips

Lights, camera, action! 📸 In the thrilling world of triathlons, every heartbeat, every pedal stroke, every determined stride is a moment worth capturing. Whether it’s your first race at the Kerrville Triathlon Festival or you’re a seasoned pro, nailing that perfect race photo becomes part of the victory. But how do you freeze those split seconds of glory into a frame? You’ve trained hard for the race; now it’s time to make sure the camera catches you at your best! Dive into our insider tips and tricks, and let’s make those race photos as epic as your performance. 🏊‍♂️🚴‍♀️🏃‍♂️

Swim

1. Think about your form

Looking good, heading into transition at Kerrville Tri

We have professional photographers out along the racecourse to capture your best moments throughout the triathlon. Since you know photographs are being taken, attempt to tighten up your form during the swim. You’ll be pleasantly surprised at how awesome a mid-swim photo of yourself can be!

2. Be ready to Smile

As you are making your way out of the water into T1, you can count on one of our amazing photographers to be there to capture the moment. Pro tip: smile BIG! We love seeing our participants having a great time moving on to the next portion of the tri, and these are often some of the coolest photos we get from Kerrville Tri!

Bike

1. Check your positioning

Giving the camera a thumbs up and a smile on the bike

Flash a quick thumbs up to the camera when you see it along the bike portion!

Bike photos are an awesome chance to get a great close-up race picture. However, no photo is worth losing control of your bike. We know everyone has their favorite riding position to be in when in the saddle. Rather than changing the position you’re comfortable with, simply give the photographer a smile or a thumbs up when you cruise past them! You’ll be very impressed at how they turn out. Keep your eyes on the road and flash the photographer a smile when you pass them by!

Run

1. Position your bib in T2

To make sure your personalized bib can be seen in your race photos, place it in the front-center of your race tri suit or shirt.  This is also important for the automated photosystems to use this to tag your photos. This way you don’t have to sift through thousands of photos to try and find yourself, FinisherPix will do it for you!

2. Stand Tall

After the swim and bike portion, we know you’ll feel tired throughout the run course. This is when we tend to let our shoulders fall forward. But, when you see the photographers up ahead, stand up a little taller! No matter how you feel on the inside, this is a sure way to make you look effortless during the run portion.

3. Lengthen your stride

Running through the Kerrville Tri run course

Look at that stride!

Elongate the appearance of your legs by lengthening your stride for a couple of steps when you see a camera! You don’t want to do this for the entire run portion of Smokin’ Good Tri, but it won’t hurt for a couple of photos when you catch a glimpse of the camera (not to mention, you’ll love how long your legs will look in these photos)

4. Relax your face and think positive

We know, easier said than done, but start practicing now when you go out for your training runs. Make your cheeks soft and say the word “Money.” Give it a try in the mirror and see for yourself. Hopefully, you’ll already be smiling from all the fun you’re having during the triathlon, but when you see a photographer ahead of you relax your face and enjoy yourself! We can assure you, the pictures are bound to turn out fantastic! Giving the photographer a thumbs up, about to cross the finish line!

5. Have fun!

This is by far the most important thing to remember if you want some incredible race photos. If you’re having a good time, it’ll show in the pictures. The photographers are there to capture your accomplishments, so the most important thing to remember is to have fun! You’ll be able to look back at these photos forever, so it’s important to make the most out of your experience.

And there you have it! Your comprehensive guide to looking your best in every snap from start to finish at the Kerrville Triathlon Festival. 📸 Whether it’s a poised swim shot, a dynamic bike capture, or a triumphant run moment, these tips are your secret sauce to memorable race photos. Don’t forget, your biggest asset is the joy of the race itself – let it shine through, and the camera will do the rest. Ready to immortalize your incredible achievement? Pre-order your photos now with FinisherPix and lock in that great discounted price. See you at the finish line, smiling and ready for your close-up! 🏁 🎉

Follow these steps, and get ready to look your best in all your Kerrville Tri race day photos! Pre-order your photos now with FinisherPix to get a great discounted price!

This post was originally published on https://zone3.us/blogs/blog/what-to-eat-and-when-to-eat-during-a-triathlon

By Glen Gore, former pro triathlete and current coach.


If ever there was a hot topic of debate, it comes in the form of triathlon nutrition and more importantly, nutrition intake on race days.

What exactly do you need to eat and drink, and when?

To start this editorial piece, we need to agree that there is no magic formula that will work the same for everyone. Each of us differs in our body mechanics and the way we work with nutritional absorption that it’s almost impossible to pinpoint one clear plan that will work for everyone.

Having said that, you can still use sound advice and at least start on the right track. For us, nutrition is another important discipline in the sport of triathlon. The fastest and most finely tuned sports car in the world will go nowhere fast if there is no fuel in the tank. Similarly no matter how hard you have trained and prepared if you are going to race on zero nutrition, your body (engine) is going to slowly come to a complete stop and falter.

Rule no 1 – don’t neglect your nutritional intake on race days. It’s quite easy to “forget” to drink and eat when you are giving 100% during an all-out race effort. Just know that sooner or later, you will start to run out of energy stores and that is when racing becomes anything but fun.

Fuelling is different depending on the distance

A Sprint Distance triathlon race is completely different from an Olympic, Half, or full Ironman distance event. These distances require different amounts of training loads to be fully prepared to take on the challenge. The same rule applies to how you fuel the body during an event that takes less than 60 mins compared to an event that may take up to 17hrs.

Sprint

A sprint race normally lasts anywhere between 52 minutes for the PRO’s up to say 1.5-2hrs for the backmarkers. Most of the time – depending on weather conditions, you can get away with next to nothing in the form of intake over the sprint distance. Some hydration via a small sports bottle and perhaps 1-2 gels for the bike and run should sufficiently see you through the event.

I have often found that my best results over the sprint distance come when I go in “light” – not much food in the tank – that empty feeling but with just enough energy stores from the previous night’s meal or early morning small breakfast to see me through the event.

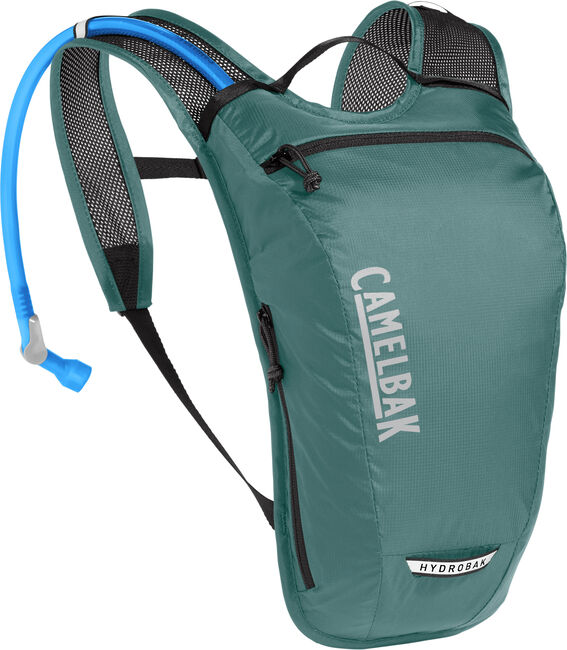
Hydration is always important – you never want to start any event “thirsty” so make sure the fluid levels are topped up in the form of small sips. A huge intake of fluids just before the start is not a suggested best practice for an optimum result over short distances. 

These should be taken as pure guidelines and not as hard-fast rules – these suggestions come from trial and error on the battlefield.

Olympic

When you compete in an event that spans longer than 2hrs, then you need to start looking at a more efficient fueling system.

The Olympic distance event can take anywhere from 2hrs to 3hrs plus – eating and drinking now becomes more important. If you are not fuelling adequately over the 40km cycle, you will feel the burn when you enter the hunt on the 10km run.

Some athletes require less nutritional intake than others while others may require more fluid intake. The best place to learn what your body requires is by trial and error. The more you race over this distance, the more you will learn as to what you require and when. 

Half-Distance

When the event time spans over 4hrs in duration right up to 8h30, then you will need a tried and tested method, worked on in training, to see you adequately fuelled in a race that covers a whopping 113km.

The many trained brick sessions will give you a firm indication of what will work for you on race day and what will not. It does become quite expensive when your training sessions have to mimic race days but as the saying goes, practice makes perfect. The more you practice eating and drinking over the longer distances in training, the easier the transition will be from training days to half-distance racing days.

Full IM Distance

So many athletes have “bonked” or “hit the wall” over the full IM distance simply because they ran out of fuel. The body was prepared, the mental side was in place but the “engine” for some reason was neglected.

Firstly consider that a normal day at work would require someone to eat breakfast, lunch, and dinner. Now add in 3.8km of swimming, 180km of biking, and a 42.2km marathon to top it all off, covered in a time that may span at least 17hrs. Now it becomes apparent just how much food and drink is required to keep you moving along at an optimum level.

Best Fuelling Tactics during Training

  • Find a product that works and more importantly is cost-effective. Just because it’s expensive does not mean it’s better.
  • Trial and Error – the brick session will help you develop a suitable war plan for race days. If it works in training, more than likely it will work during the race.
  • Make sure you re-fuel within 15-30 minutes after a strenuous workout. As athletes, we often neglect the post-training refueling strategy. Remember you are not only eating for today but you are eating for tomorrow’s training session as well.

Best Fuelling Tactics during Racing

  • Eat small bits and drink small sips all the time – especially during the longer races – the reason being to keep the tank on full at all times and not deplete it before you think about replenishing. 
  • Cut up your energy bars into small bite-size pieces – this is much easier to eat and digest while on the move.
  • Get in some solid food sources quickly once you are done with the swim. The longer the duration of the event, the more advisable to start the cycle with something a little more substantial than just a gel.
  • Don’t overload your bike with too much nutrition and hydration. This makes that very expensive bike extremely heavy. The bigger races have more than an ample supply of nutrition along the way – make use of it even if you need to stop briefly and take some on-board.
  • Don’t start the run in a hurry. T2 over long distances is a time where you need to relax a little and consume some solid nutrition before you head out onto the run. Whatever time you lose in transition you will more than makeup, especially when the run distance is over a full standard marathon.

Common Fuelling Mistakes

  • Eating only when hungry – this means it’s already too late. It will take you a long time to get back those lost energy stores, time which you won’t have during the race days.
  • Drinking only when thirsty. Once again, this is too late – if you are feeling thirsty you are already on the way to partial dehydration. Keep on sipping water and juice so you never get to feel that thirst.
  • Trying new stuff on race day. Stick to what you know and what you have trained on.
  • Don’t alter the nutritional plan. What you practiced in training, do the same on race day. Don’t change the formula, there is a good chance it won’t work.
  • Drinking too much. This can be a problem worse than drinking too little so take the race weather conditions on the day into account and drink what is normal for you.

Nutrition is important, a successful race plan always has a well thought out nutritional plan that goes along with it, and remember, it takes trial and error to perfect – good luck!

Click here to shop ZONE3.

If you bought a 50-year-old Porsche 911 everyone would say you bought a classic car, but when athletes turn 50 people tend to think they become junk heaps.

The athletes themselves know that training at 50+ can be just as rewarding and fun as racing when you are younger and stronger. It just takes a different focus, and your training needs to be modified, to fit your older and more worn body.

Specificity, strength, speed, and rest become the most important part of maintaining a racing lifestyle for an athlete over 50.

Specificity

Specificity is training to fit your racing.  It makes no sense to ride 100 miles if you are training for a 10-mile Sprint Tri, or swim 7 days a week when your swim is 500 yards.  Your training needs to be focused to fit your goals and the races you choose. If your races are long, then long, slow miles are in order whereas shorter races will call for more intense workouts of shorter duration. Your body can usually handle intensity OR distance but not usually both at the same time.

Strength

Every triathlete should be doing 2-3 days of strength training a week.  Triathlon has your body using muscles in a very limited range of motion for long periods of time. Strength training can keep your muscles balanced and help prevent injury.  No need to focus on the physique of The Rock.  Your strength training should be lower weight and higher reps.  Leave the high weight and low reps to the muscle-bound mirror watchers at the gym.

Speed

Speed is often forgotten as athletes age.  They tend to do lots of “Junk Miles” meaning they slog through a slow 20 mile ride or shuffle 10 miles on the run.  Those can be helpful on easy days, but on the hard days, you need to bring intensity.  Go to the track on your hard days and push your speed.  Do some hard and fast 100’s in the pool, or try out fins.  You only increase your speed by doing the activity at a higher pace. Keep in mind that your body cannot handle the same intensity as the younger athletes. Don’t try and keep up with the 30-year-olds at the track.

Rest

Rest is the most underrated training tool that triathletes have yet it holds so much power. Getting to a workout after a miserable night’s sleep and then pushing yourself is a recipe for injury and no fun.  You should try to get 7-8 hours of good solid sleep every night.  If you get up at 4:30, to meet your running group, you need to be in bed by 9:00 or even 8:30.  You can train yourself to go to be early. Getting your body to adjust to an early bedtime is just like any other training you do.

Racing and training over 50 can be incredibly rewarding. When you pass another 50+ athlete you always get a “hey” or head nod.  They know what you are doing to still be active, and fast, and they appreciate it.  It’s like joining a Porsche Club for classic cars only you have joined the club of Athletes Over 50. These club benefits are the most rewarding you will find.

Persistence can be your secret weapon.


Author Bio: Steve Mallett has been racing triathlons since 1984 and has completed over 120 races.  He has completed many 50 mile running races and in 2019 completed the Rim to Rim to Rim in the Grand Canyon.  He loves training with new and veteran athletes.  Steve has the nickname Realtor Runner, is a former USA Triathlon coach, a Kerrville Triathlon Ambassador, and is a member of Team Zoot.

During training, you don’t have the luxury of aid stations like you do on race day. As if you needed another reason to love race day, hydration on course has always been a fan favorite. However, during training runs it is critical to stay properly hydrated. Make sure you carry hydration with you on your runs. If you’ve just started training make sure you follow these tips to keep your training running smoothly.

Try one of the options below to carry hydration on your next run. There are links below where you can order these items or you can visit our friends at Fleet Feet Austin!

Handheld Bottle 

Using a handheld bottle on the run is an easy start to carrying hydration with you on your run. There are options to have a hard bottle or soft flask handheld. The harder bottle retains its shape and usually has more insulation. The soft flask is lighter and has the option to fit in a pocket when empty. The main con to a handheld is that one of your hands will be occupied by physically holding onto the bottle as you run. 

Pro tip: It is a good idea to switch up which hand is holding the bottle during your run. 

Water Vest or Backpack 

Needing to carry more water than what can fit in a handheld, or would like your hands to be free? A water vest or backpack is a great option. The weight of the water vest/ pack is distributed more evenly through the torso, which allows for a more symmetrical weight distribution while running. These options also have extra storage to include nutrition or your phone during your run.

When deciding between a vest or a backpack think of how you want it to fit and where you want your water storage at.

  • Vest
    • A hugging fit. It keeps things close to your body for a tighter fit that reduces bounce. 
    • Bottles in the front pockets and option for hydration bladder in the back.
  • Backpack
    • Fit is more relaxed. 
    • Bigger hydration bladder capacity. Some have options for a bottle in the front

Pro tip:  Always be conscious of how a vest/pack rubs on the inside of your arms and neck/shoulder areas.  Any bit of uncomfortable chafing will be multiplied by sweat and miles, so choose wisely. Try Body Glide anti-chafing cream!

Water Bottle Waist Belt

If you want your hands free and don’t like the idea of carrying more weight through your torso a waist belt is worth a try. We like SPIbelt’s Distance Pro because the two, 8-ounce bottles can be placed anywhere on the elastic, allowing runners to maximize comfort. This running belt is built for durability and can keep up with your longest runs.

The belt pocket expands to hold larger smartphones, including the iPhone12 Pro Max, and Galaxy S20 Ultra, as well as keys, ID, and more. The elastic on this belt is 1.5″ wide, 50% broader than the Original SPIbelt.

Everyone’s preference is personal to what feels best for them to carry hydration. Test out what works best for you. 

Biggest pro tip of all: Stay hydrated and have some fun!


One of the first decisions you’ll need to make when doing a triathlon is what type of suit to wear. Do you go for a one-piece or two-piece? There are pros and cons to both options, so it’s important to weigh up all the factors before making your decision. In this blog post, we’ll take a look at some of the key differences between one-piece and two-piece suits, as well as the advantages and disadvantages of each option. So read on if you want to find out more!

What is a Tri Suit?

A tri suit is a garment designed specifically for triathletes to be worn during the swim, bike, and run. They are made of a swimsuit-like material that dries quickly during your transition to the bike. They also make riding more comfortable with built-in pads that you won’t even notice during the run. It usually has built-in pockets so that you can carry some nutrition with you as well. 

Most importantly, the suit allows for a total range of movement so you can wear the suit for the entire tri. A tri suit is an element of the basic triathlon gear you need, so keep reading to understand the differences between a one-piece and two-piece tri suit.

Two-Piece Tri Suit

A two-piece tri suit is a set of tri shorts and a tri top. Some athletes prefer a two-piece because they offer a few advantages. 

For example, a two-piece is less likely to restrict your range of motion from being too tight on your shoulders and allow for natural movement. The two-piece suit also tends to feel cooler than a one-piece, due to the fact your mid-drift can be exposed.

A two-piece suit is also great for athletes who may require different-sized clothing for the upper and lower parts of their body. You can also usually find more options for the length of shorts. For women, you can find inseams from anywhere from 5 inch to 8 inch. Many prefer a shorter short length for short distances or training while a longer length can help prevent chaffing on longer distances. 

One drawback is the two-piece can be less aerodynamic during the bike portion if the suit bunches up. Leaning too far forward on your bike can also cause the back of your tri top to rise up and lead to exposed skin. This is not ideal to protect your skin if you were to fall on the bike course or raise the risk of getting a sunburn.

One-Piece Tri-Suit

One-piece tri suits are more commonly preferred by most athletes for simplicity. A one-piece suit typically has some compression built-in, making the suit more aerodynamic for athletes who opt for a one-piece. Athletes also say there’s less chafing with a one-piece because there are fewer seams in the suit.

Many prefer a one-piece because you don’t have to worry about your shirt riding up or your shorts moving down exposing your mid-drift. Less shifting around = more time saved and a more comfortable experience.

Lastly, a one-piece suit is a better option if you will be wearing a wet suit during your race again because you don’t have to worry about anything moving where it shouldn’t when you go to peel off your wetsuit. 

Men's Activate Plus Short Sleeve Trisuit - Zone3 USA

One drawback of a one-piece suit is the material the suit is made of can cause you to feel warmer throughout the race. This is important to take this into account depending on which tri distance you complete and what time of year your race takes place. You can look for a one piece that has a zipper for venting if needed. The other drawback is that you have to find a suit that works with your torso length, finding your “dream” suit can take longer with more trial and error.

At the end of the day, comfort is most important when choosing the best tri suit for you, if you decide to wear one at all. Hopefully, now you have the knowledge and tools you need to get yourself the perfect suit for your upcoming tri!


Adjusting your bike to the perfect saddle height is crucial in order to maximize comfort and payoff during your training rides for Kerrville Tri. Incorrect height leads to pain and discomfort during and after your ride. It can also prevent you from improving your performance on the bike. Learn the importance of correct saddle height, and how to adjust your bike to the perfect fit with these easy steps.

What is Saddle Height?

Saddle height is measured by the distance between the center of the pedal axle and the top of the saddle, or your bike seat. This is set by adjusting the seat post to your ideal height to balance your comfort and power on the bike. This height is arguably the single most important adjustment on your bicycle. Incorrect height can contribute to discomfort in the saddle, anterior and posterior knee pains, and ultimately limit how much power you produce.

How To Adjust Your Saddle Height

There are many ways you can approach finding your perfect saddle height. One of the best approaches is to establish it based on the rider’s individual ride characteristics and flexibility. You can follow the “heel to pedal method” before your next ride. This will get you in the ballpark.

  1. Stand next to your bike and raise the saddle to your hip to get an idea of where to start.
  2. Get on your bike, and place your heel on the pedal to determine if you will raise or lower your saddle.
    • If you are having trouble making contact with your heel to your pedal – the seat is too high.
    • If your knee is bent – it is too low.
  3. Put your bike on the trainer and adjust accordingly.
  4. Get back on your bike with your heel on the pedal and pedal backward to reach the six o’clock position.
  5. Your leg should be completely straight, without being overextended to achieve the correct saddle height.

Pro tip: Make very small adjustments during this process, then repeat until you have found the perfect height.

Ready to Ride

Once you find the proper height, use a piece of electrical tape around at the base of the post where it meets the seat clamp as a marker. Take a tape measure and record the measurements, in case you need to make very slight adjustments in the future.

Have a professional look at your bike every few years to achieve maximum comfort. After adjusting your bike to the perfect saddle height, make the first few rides short. Give it time!  Your body may need a few sessions to adapt to your new height before you feel yourself improving on your cycling journey. How often do you check your saddle height? Let us know on Facebook and Twitter.

When it comes to choosing bike pedals, you need to consider the best option to meet your needs depending on the kind of riding you’ll be doing. It’s all about personal preference and what you feel most comfortable with. If you’re in the market for some new pedals, keep reading to understand the different types of bike pedals to figure out which ones are right for you.

Types of Pedals:

There are two basic types of bike pedals: Flat and Clipless. Flat pedals are the more common of the two when it comes to triathlon because you wear regular running shoes with this type of pedal. Which is great and convenient for the bike to run transition. Clipless pedals are great for athletes who want to feel more at one with the bike. With these pedals, you’ll need to wear special cleats that clip into the specific type of pedal system that’s compatible with your cleats.

Different Benefits:

Flat Pedals

There are many benefits of flat or platform pedals. Any type of shoe you decide on will work with this type of pedal. They’re great for a quicker bike-to-run transition because, without changing shoes, you eliminate the need to spend any more time in transition.

Flat pedals also reduce any anxiety you may have about falling over during the bike leg. You can put your feet down to catch yourself, as opposed to if you were clipped into the pedals. Lastly, this is the more common and affordable option of the two kinds of pedals. Flat pedals can be found for $10 – $40.


Clipless Pedals

There are also many benefits of a Clipless Pedal (clipless means clipped in). Increase your speed during the bike portion by being clipped into your bike pedals. This allows you to take full advantage of your pedal stroke, which in turn allows you to ride faster once you have mastered the push and pull of it.

A smoother more efficient pedal stroke will lead to better average power output. Being clipped in can actually keep you a little safer while riding because it reduces the chance of your foot slipping off the pedal while climbing, descending, or fatigued. There are endless options when it comes to choosing clipless pedals if that is the

You can go clipless right from the start or use flat pedals until you are more comfortable in the saddle. There are benefits to each type of pedal, but the important thing is to choose what is more comfortable for you. Whatever you choose, spend time becoming familiar with your bike pedals to maximize your efficiency on race morning of Kerrvile Tri!

Learn what causes skipping chains and what you can do about it

There are two main causes for skipping chains. The most common cause is the misalignment of the rear cogs and the chain itself. The second most common cause of skipping chains is wearing on the chain, cassette, and/or the chainrings. Read below to see what causes each and how you can prevent chain skipping and extend the life of your bike.


There are several things that can cause the misalignment of the rear cogs and the chain.

  • Improper cable tension. When the tension is incorrect the chain does not sit in line with the corresponding cassette cog and is trying to jump to the next cog. 
  • Dirty cable. The dirt prevents the cable from moving like it needs to. 
  • Slightly bent hanger for the rear derailleur. Can affect the alignment.


Skipping chains will wear on the chain, cassette, and/or the chainrings. The chain is the most likely to wear out first since it is made entirely of small, moving parts. Those parts tend to wear out faster when they are dirty or ridden dry. Chains on most modern drivetrains usually last anywhere from 1500 to 2000 miles. This can change depending on your riding style and how well you maintain your bike. If you keep your drivetrain clean and you tend to spin at a slightly higher cadence then you will get more mileage out of your chain. Follow these six steps to clean your drivetrain.


When the chain wears, it no longer sits evenly on the cassette cogs and chainrings. As this goes on the chain will eventually start to jump since the chain wears much faster than the cassette and chainrings. If you let your chain go too long it will start to wear down the teeth of the cassette first and then the chainrings. If the chain is replaced before it is too worn the cassette and chainrings will outlast the chain many times over. You’d much rather want to replace your chain than the cassette and chainrings.


Pro tip: Use this bike tool to measure chain wear at home. 


“Comfort zones: If you live in one too long, that becomes your norm. Get comfortable being uncomfortable.” — David Goggins

If you’ve ever completed a triathlon, you already know what it means to break through your comfort zone. Not everyone can, or will accomplish that in their lifetimes. But when it comes to the off-season, it’s easy to fall into your couch and let the weeks fly by. This article will show you how making new goals during winter training can actually transform you.


Where Are You Headed?

So you’ve done a triathlon or more. You’re no stranger to discipline. You know what it means to endure long hours of training just to arrive at that final cathartic moment when you blaze past the finish line.

And now it’s off-season. Winter’s here. You can feel it in your bones. Your calendar’s filled with parties and other fun activities instead of training.

This is when the days grow shorter, and the ground becomes colder. None of these are ideal circumstances for training outdoors. So why not relax and let loose?

Here’s the thing.

You don’t suddenly transform into who you’re supposed to be on race day. You get there — slowly — by sculpting your body day-after-day, inch-by-inch. 

Everything you do before race day is what makes you who you are. In this sense, it’s arguably more important that you participate in winter training than at any other time. 

All else remaining equal, the athlete who doesn’t let themselves go during the off-season has a competitive edge over everyone else who does. 

And just because it’s winter doesn’t mean you can’t train. While it’s not the most ideal time for breaking your past records, it is the best time to focus on maintenance, covering up weaknesses, and becoming injury-proof.


Enter The Half Marathon

Whatever goals you might have for the future, it’s a good idea to do half the distance of next season’s race in preparation. You don’t need to exceed a half-marathon.

Stay active, but reduce the length of all your training sessions. This is because you want to focus on recovery, overcoming injuries, and keeping your mind sharp. 

As long as you stick with a consistent regimen, you can always add or subtract volume later. But if you completely ignore winter training then it’ll take a long time for your body to return to its peak condition. You need to keep the engine running so you can jump into action whenever you need to.

Even if you can’t go outside, you can swim, bike, and run on a treadmill indoors. You can fix up imbalances, weaknesses, or take up yoga and strength training to explore new ground.

One of the best ways to experience a half-marathon is through the 3M Half marathon that’s held in Austin, Texas on January 23, 2022. This event features a course that’s 13.1 miles (21.08 km) long. It ends with a post-race party that’s filled with plenty of food trucks serving some of the best tacos and BBQ you’ll ever have. Make sure to sign up before race day to remain eligible.

Or, if you wait a little longer, you can enter the Ascension Seton Austin Marathon, Half Marathon and 5K on February 20th. This course passes through some of the most iconic landmarks in Austin, and is close to some amazing hotels, restaurants, and shops that you can enjoy with your whole family.

Don’t think. Sign up now. Imagine crossing the finish line to a roaring crowd all over again. You’ll only ever regret the things you don’t do and never the things you’ve done.


Follow our advice to get better at hydrating while cycling

If you’re new to cycling, one of the challenges to get accustomed to is knowing how to drink water while peddling. Just as there is skill needed to balance, ride curves, and pump uphills, technique is needed to hydrate without losing your balance and falling off your bike. Here are some tips for hydrating while cycling.

Use a squirt-top bottle instead of a cap bottle

A water bottle with a cap requires you to twist it open, which is cumbersome to do with one hand on a bike. When it comes to squirt-top bottles, you can simply use your teeth to open the valve and start drinking with one hand as you control your bike with the other. The convenience a squirt-top bottle offers during cycling allows you to focus on the course more and avoid any accident.

Make use of the bottle cage on your bike

To carry water on the road, you can use a bottle cage on your bike. The bottle cage can be installed between the bars, on the frame, or near the saddle to help you reach your drink with zero fuss. Here are the pros and cons of each bottle cage.

Aero Bottle Cage

This type of cage is designed so that it can be attached to multiple parts of the bike frame. Most other cages can only be mounted to the frame.

Pros
– easiest to access
– option to install it either vertical or horizontal
– using horizontal bottles at the front can decrease aerodynamic drag

Cons
– poor aerodynamics compared to other cages
– using vertical bottles can cause even higher aerodynamic drag.

Bike Frame Cage

These are very common bottle holders that can be placed on the frame, seat post, or handlebars.

Pros
– slim aero bottles on the down tube are less affected by drag and side wind.

Cons
– intermediate aerodynamic drag
– large frame-mounted bottles are expensive and difficult to clean.

Rear Hydration System

This is an aerodynamic bottle that is mounted behind the seat post. These are more so used by competitive triathletes partaking in very long distances.

Pros
– best choice in terms of aerodynamics
– least affected by side wind

Cons
– requires a cage with a strong grip to prevent bottle-launching
– must be made of a favorable material to oppose side sway

Take advantage of the straight-aways

Think about when the ideal time to take a sip is and be ready to do so. Trying to pull the water bottle out on curves is much more challenging, so wait until the trail is flat and straight to get your drink.

Practice, Practice, Practice

Ride up and down your street over and over and practice. Pull your water bottle out of the cage, take a sip, then put it back while moving forward. Start off slow and pick up speed as you get more comfortable.

Pro Tip: Avoid quenching your thirst in one go

Kerrville TriathlonExerting your body through exercise causes dehydration which makes you thirsty. Despite your desire to rapidly quench your thirst it’s important to not drink too much. It can be counterproductive and negatively affect your performance. It is best to avoid drinking mouthfuls and only take a few sips occasionally. You can hydrate yourself effectively without running the risk of drinking too much.

To make sure you do not run yourself dry, you should consume around 600-900 ml of water, per hour, during a triathlon, in addition to other nutritional needs. Although triathlons will have water available in transition and on the run course, not all triathlons provide an aid station on the bike course. Make sure the water bottle(s) on your bike are full so you don’t run out of water.

Hydrating while cycling can be tricky if you’re not used to it. With a secure bottle cage and lots of practice, you’ll be able to master this skill in no time.